
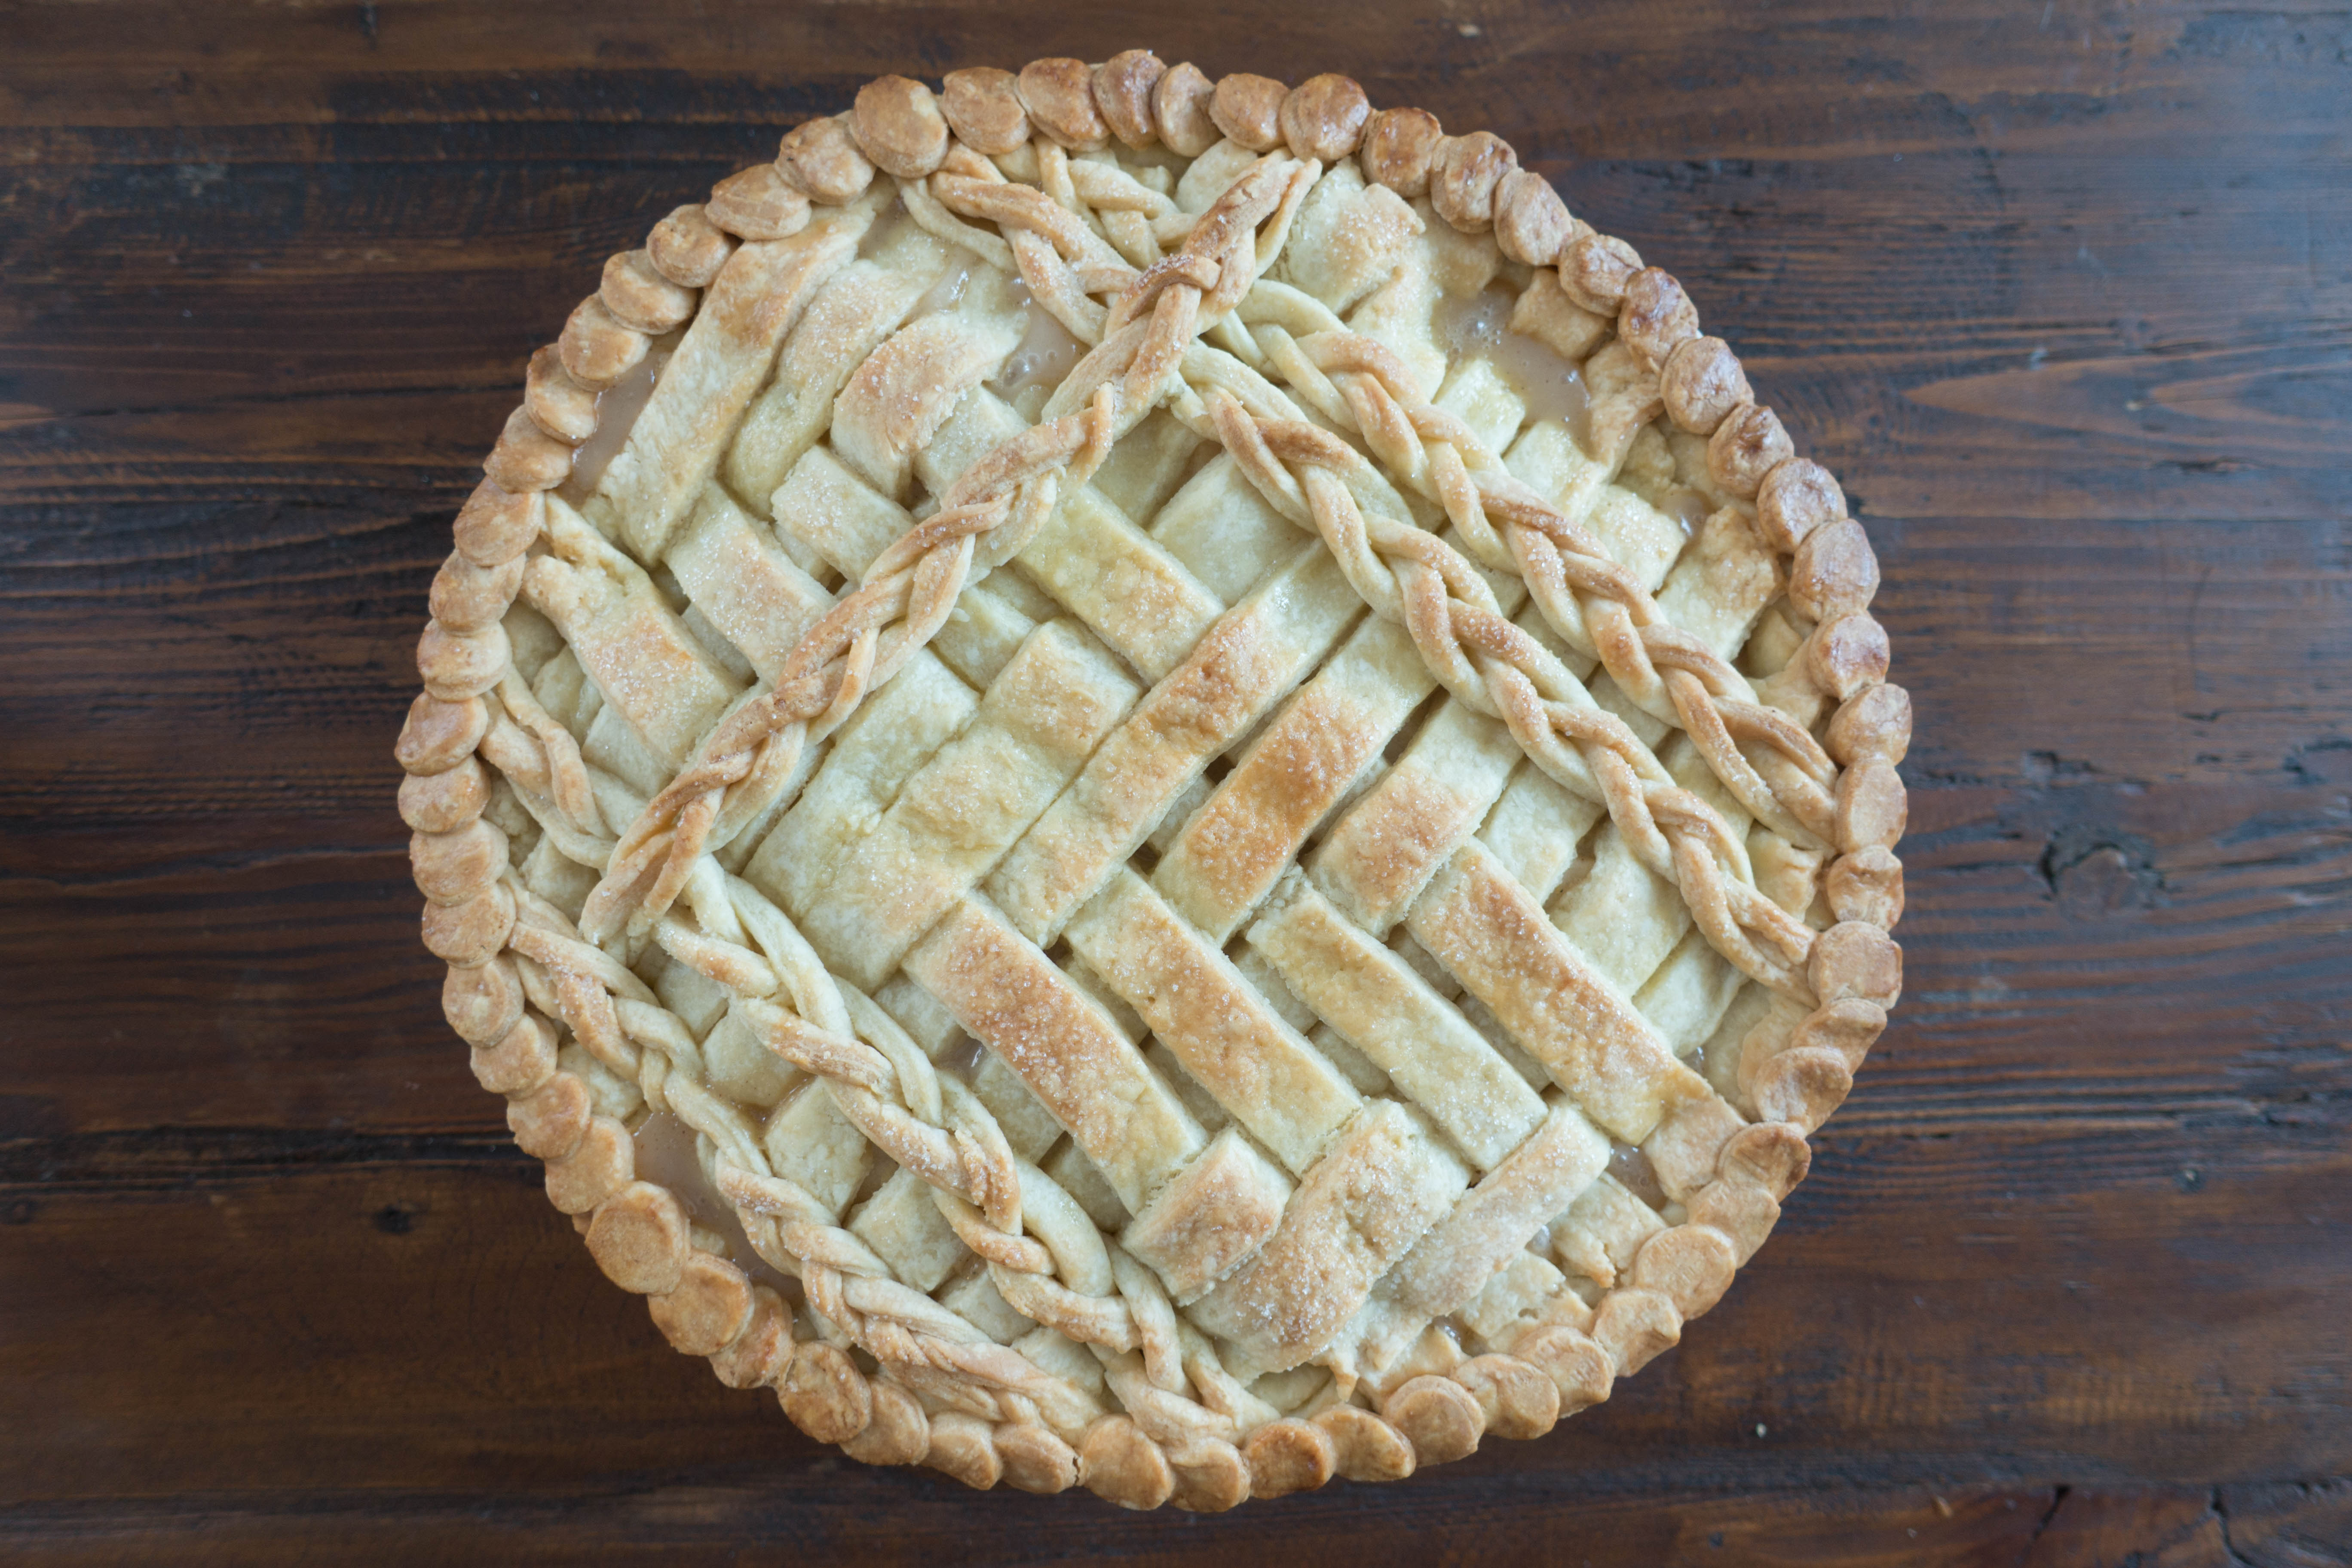
I’ve recently been really inspired to make my pies prettier. There are so many talented individuals out there getting really creative with pie! I love it. How great is social media for getting the creative juices flowing??!! I set out last week to try the herringbone pattern that I’ve been seeing so much of lately. Let’s just say I got about halfway through and improvised, creating a mash of several different techniques in order to hide my mistakes 🙂
The Dough
- 1 1/2 cups all-purpose flour
- 1/4 cup sugar
- 3/4 teaspoon salt
- 3/4 cup unsalted butter, cold and diced
- 1 egg
- 3-4 tablespoons cold water
Beat the egg with 3 tablespoons of the water; then drizzle it evenly over the dough. Lightly pulse the dough until a ball begins to form. If the dough is really dry, sprinkle it with the final tablespoon of water.
Divide the dough in half and wrap each half in plastic wrap and shape into disks. Refrigerate at least 1 hour or up to 2 days.
TIP: If you are looking to get more design-heavy with your top crust, adjust the dividing appropriately. i.e. I broke it into 1/3 for the bottom, and 2/3 for the top crust.
The Filling
- 1/2 lemon
- 3 pounds apples (about 6)
- 1 1/2 pounds pears (about 3)
- 2/3 cup sugar
- 1/4 teaspoon ground cinnamon
- 1/4 teaspoon ground ginger
- 1/4 teaspoon salt
- Generous pinch of nutmeg
- 1/4 cup butter
- 1/4 cup all-purpose flour
- 1/2 teaspoon vanilla extract
- 1 egg, beaten
Melt the butter in a large skillet over medium-high heat. Add the fruit and cook, stirring until the sugar dissolves and juices simmer, about 2 minutes. Reduce heat to medium, and cook, uncovered, until the fruit softens and the juices evaporate some, about 10 minutes. Evenly mix the flour into the fruit; then cook about a minute more to thicken the juices slightly. Stir in the vanilla and lemon zest; and remove from the heat. It should now resemble a tight compote. Cool completely.
Putting It All Together
Lightly dust your work surface with flour. I use my silicone pastry mat for any rolling since it makes working with dough a dream. Roll a disk of dough into an 11 to 12-inch circle. Transfer the dough to 9-inch pie pan, trimming so it hangs about 1/2-inch over the edge of the pan. Fill the crust with the prepared fruit and smooth out as flat as possible. I tend to usually mound my fruit filling, however, this filling is cooked down prior to baking, so it won’t deflate as a normal fruit pie would. Also, working on a flat surface for a detailed design like herringbone is KEY.
I googled my way through herringbone tutorials and found a great one on Serious Eats. I should note that the crust for this particular pie is a little less sturdy than my traditional double pie crust, as egg and sugar are included. I’m pretty sure that’s why my designing went sideways half way through and I was forced to improvise. In any event, take a look at the tutorial and try it!
I added braids to fill in the non-herringbone sections, and then used a tiny circle cutter to punch out small circles for the edge of the pie. Once everything is designed to your liking, pop the pie in the fridge for 20 minutes.
Meanwhile, place a rack in the lower third of the oven and heat to 425 degrees F.
Take the pie out of the fridge and brush with equal parts egg and water, sprinkling lightly with sugar.
Place the pie on a baking sheet and cook for 15 minutes, then reduce the temperature to 375 F. Bake until the crust is golden brown, about 50 minutes more. If the edges of the pie begin to brown too quickly, cut a pie shield out of a piece of aluminum foil and cover the edges. Depending on your design, intricate pieces may brown quicker than others. On my design, the thin braids browned to completion about 10 minutes prior to the end of the bake, so I covered the pie loosely with foil for the remaining time. As much of a pain as it might be, the key to an evenly browned pie is to intermittently check the oven (without opening!) while the pie is baking.
Cool on a rack. Slice and ENJOY!