
It’s hard to believe that Valentine’s Day is almost here! Each year, I usually re-purpose a Christmas butter cookie recipe into a heart-shaped iced cookie, but this year I decided to up my game.
I’m not much of a chocolate person, so I wanted to create an almond flavored treat with fruit. Think tea cakes on steroids. I love creating layered cakes so I’ve adapted Chelsweet’s Vanilla Cake recipe since it bakes so evenly and is perfect for layering. For the frosting/filling, I wanted something fruity and pink (because, well…Valentines) that would complement the almond cake. I found what looked like a great Strawberry Buttercream recipe, modified the texture, and gave it a shot.
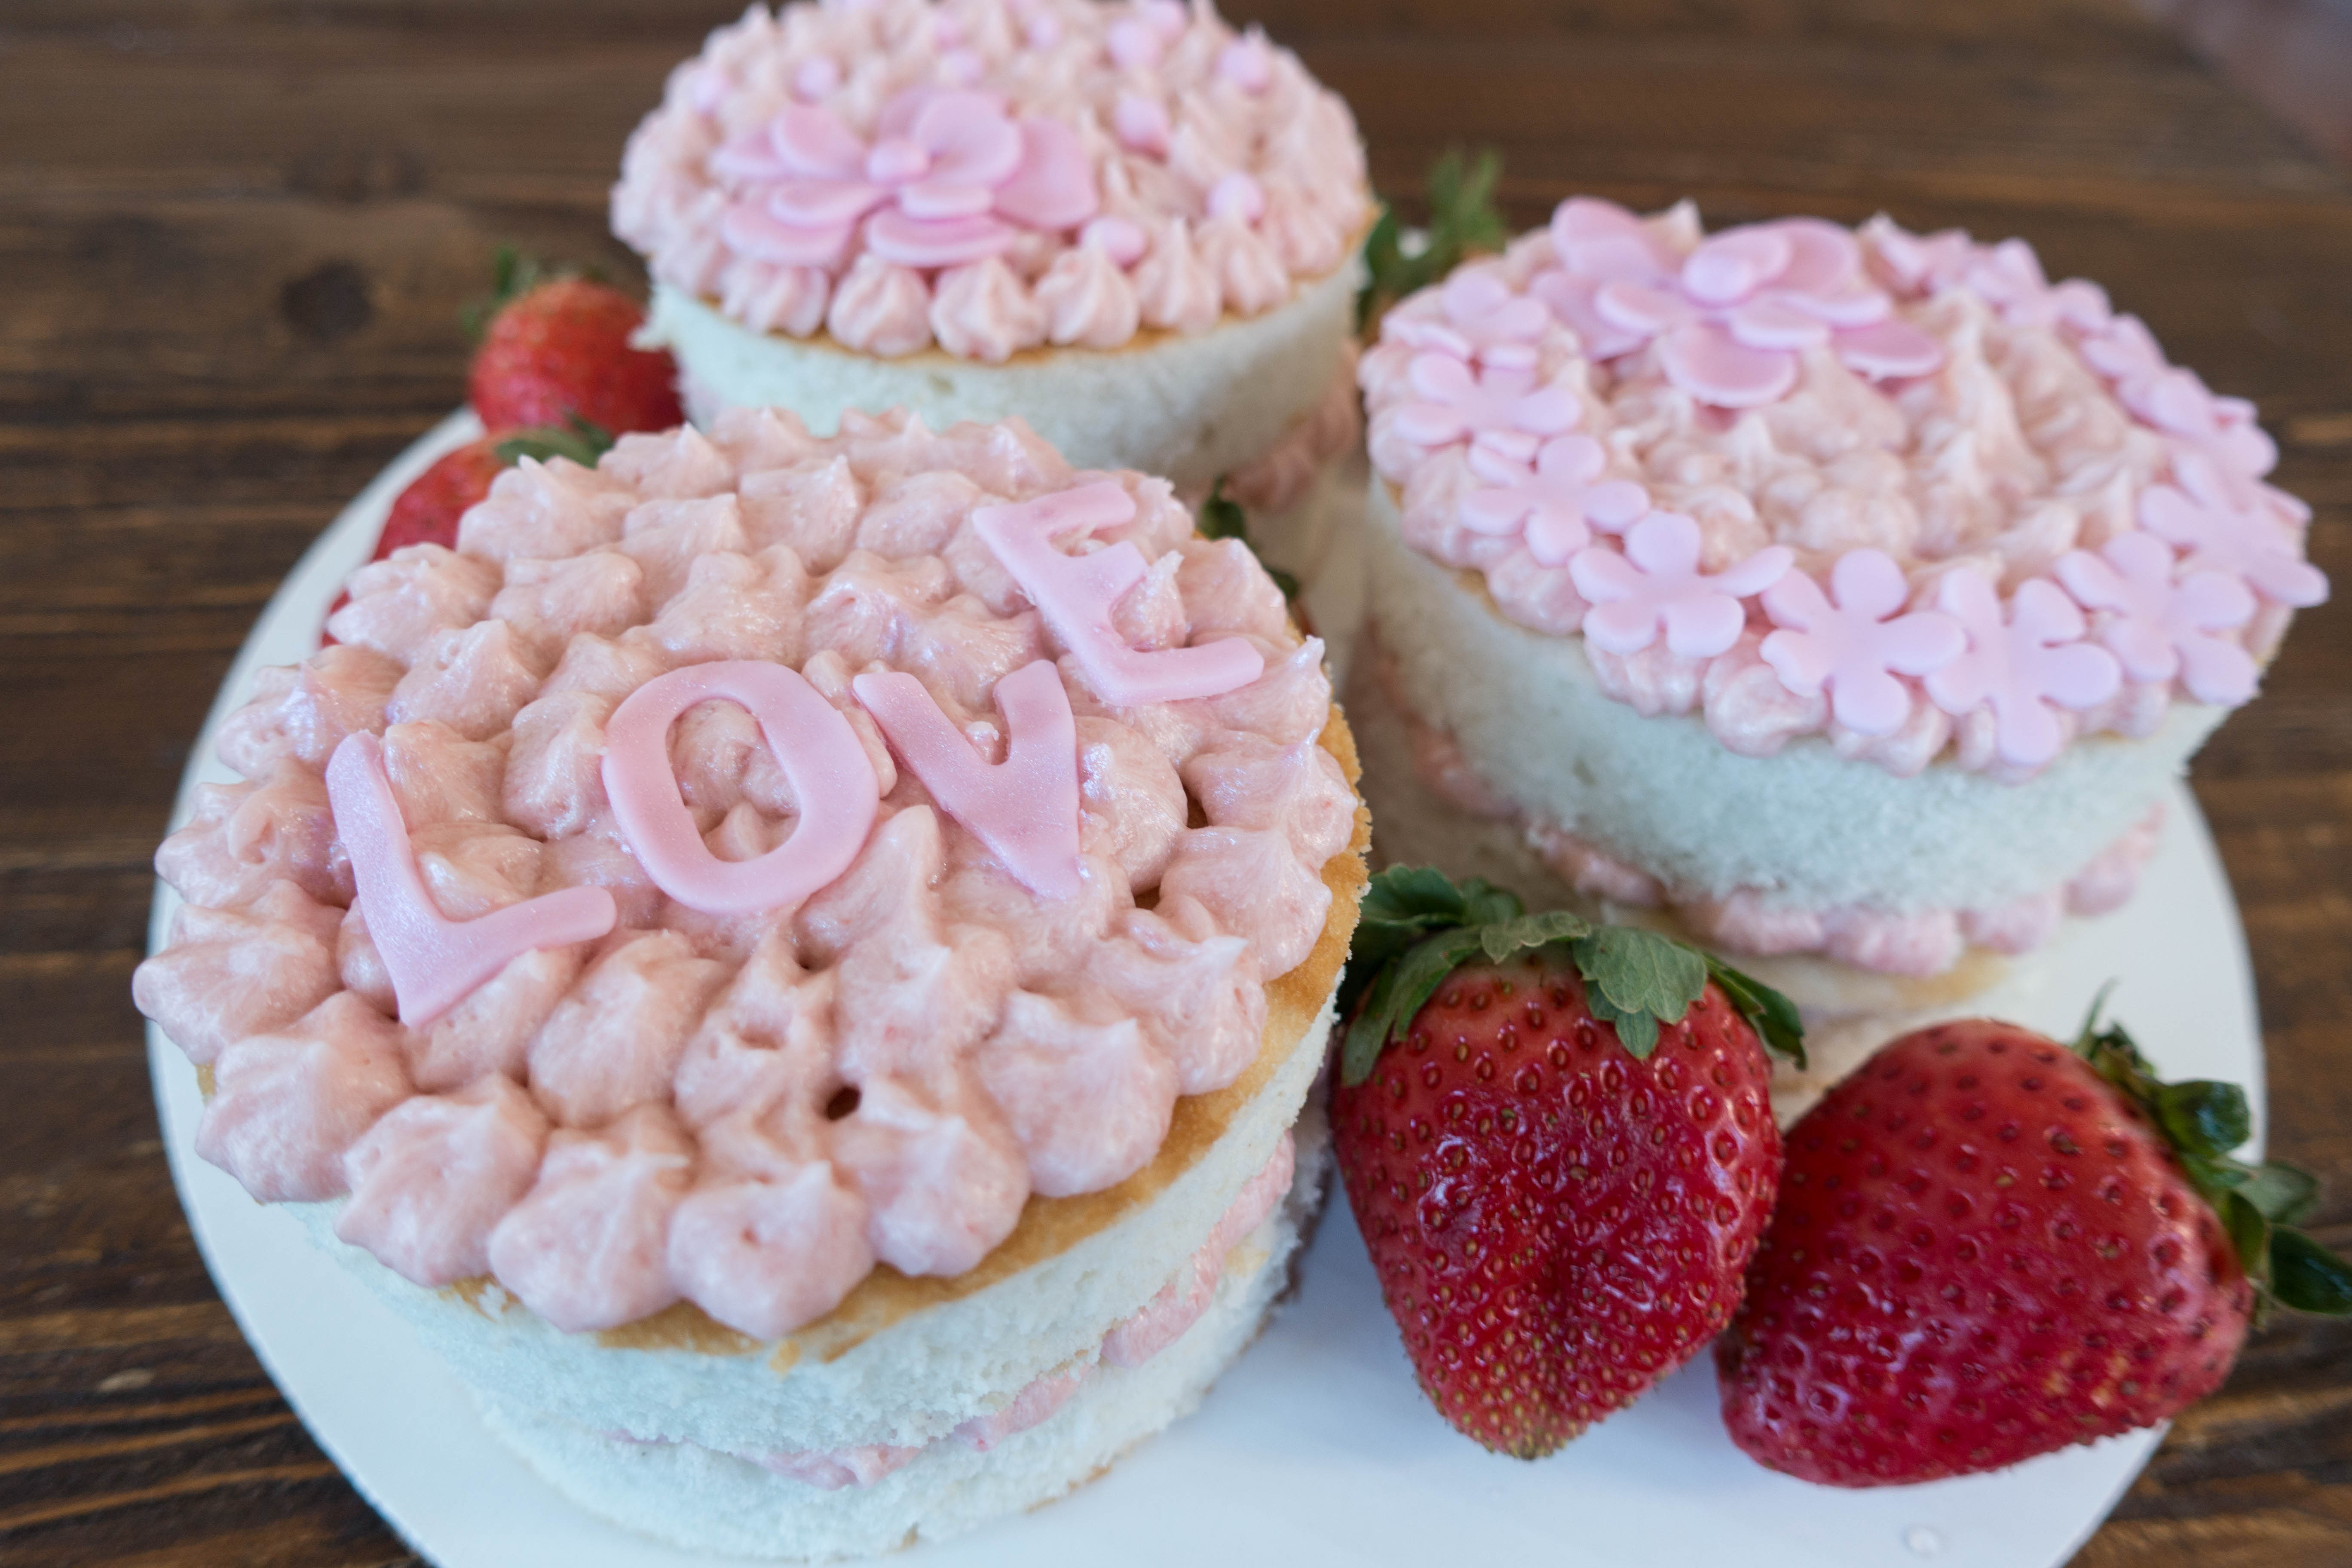
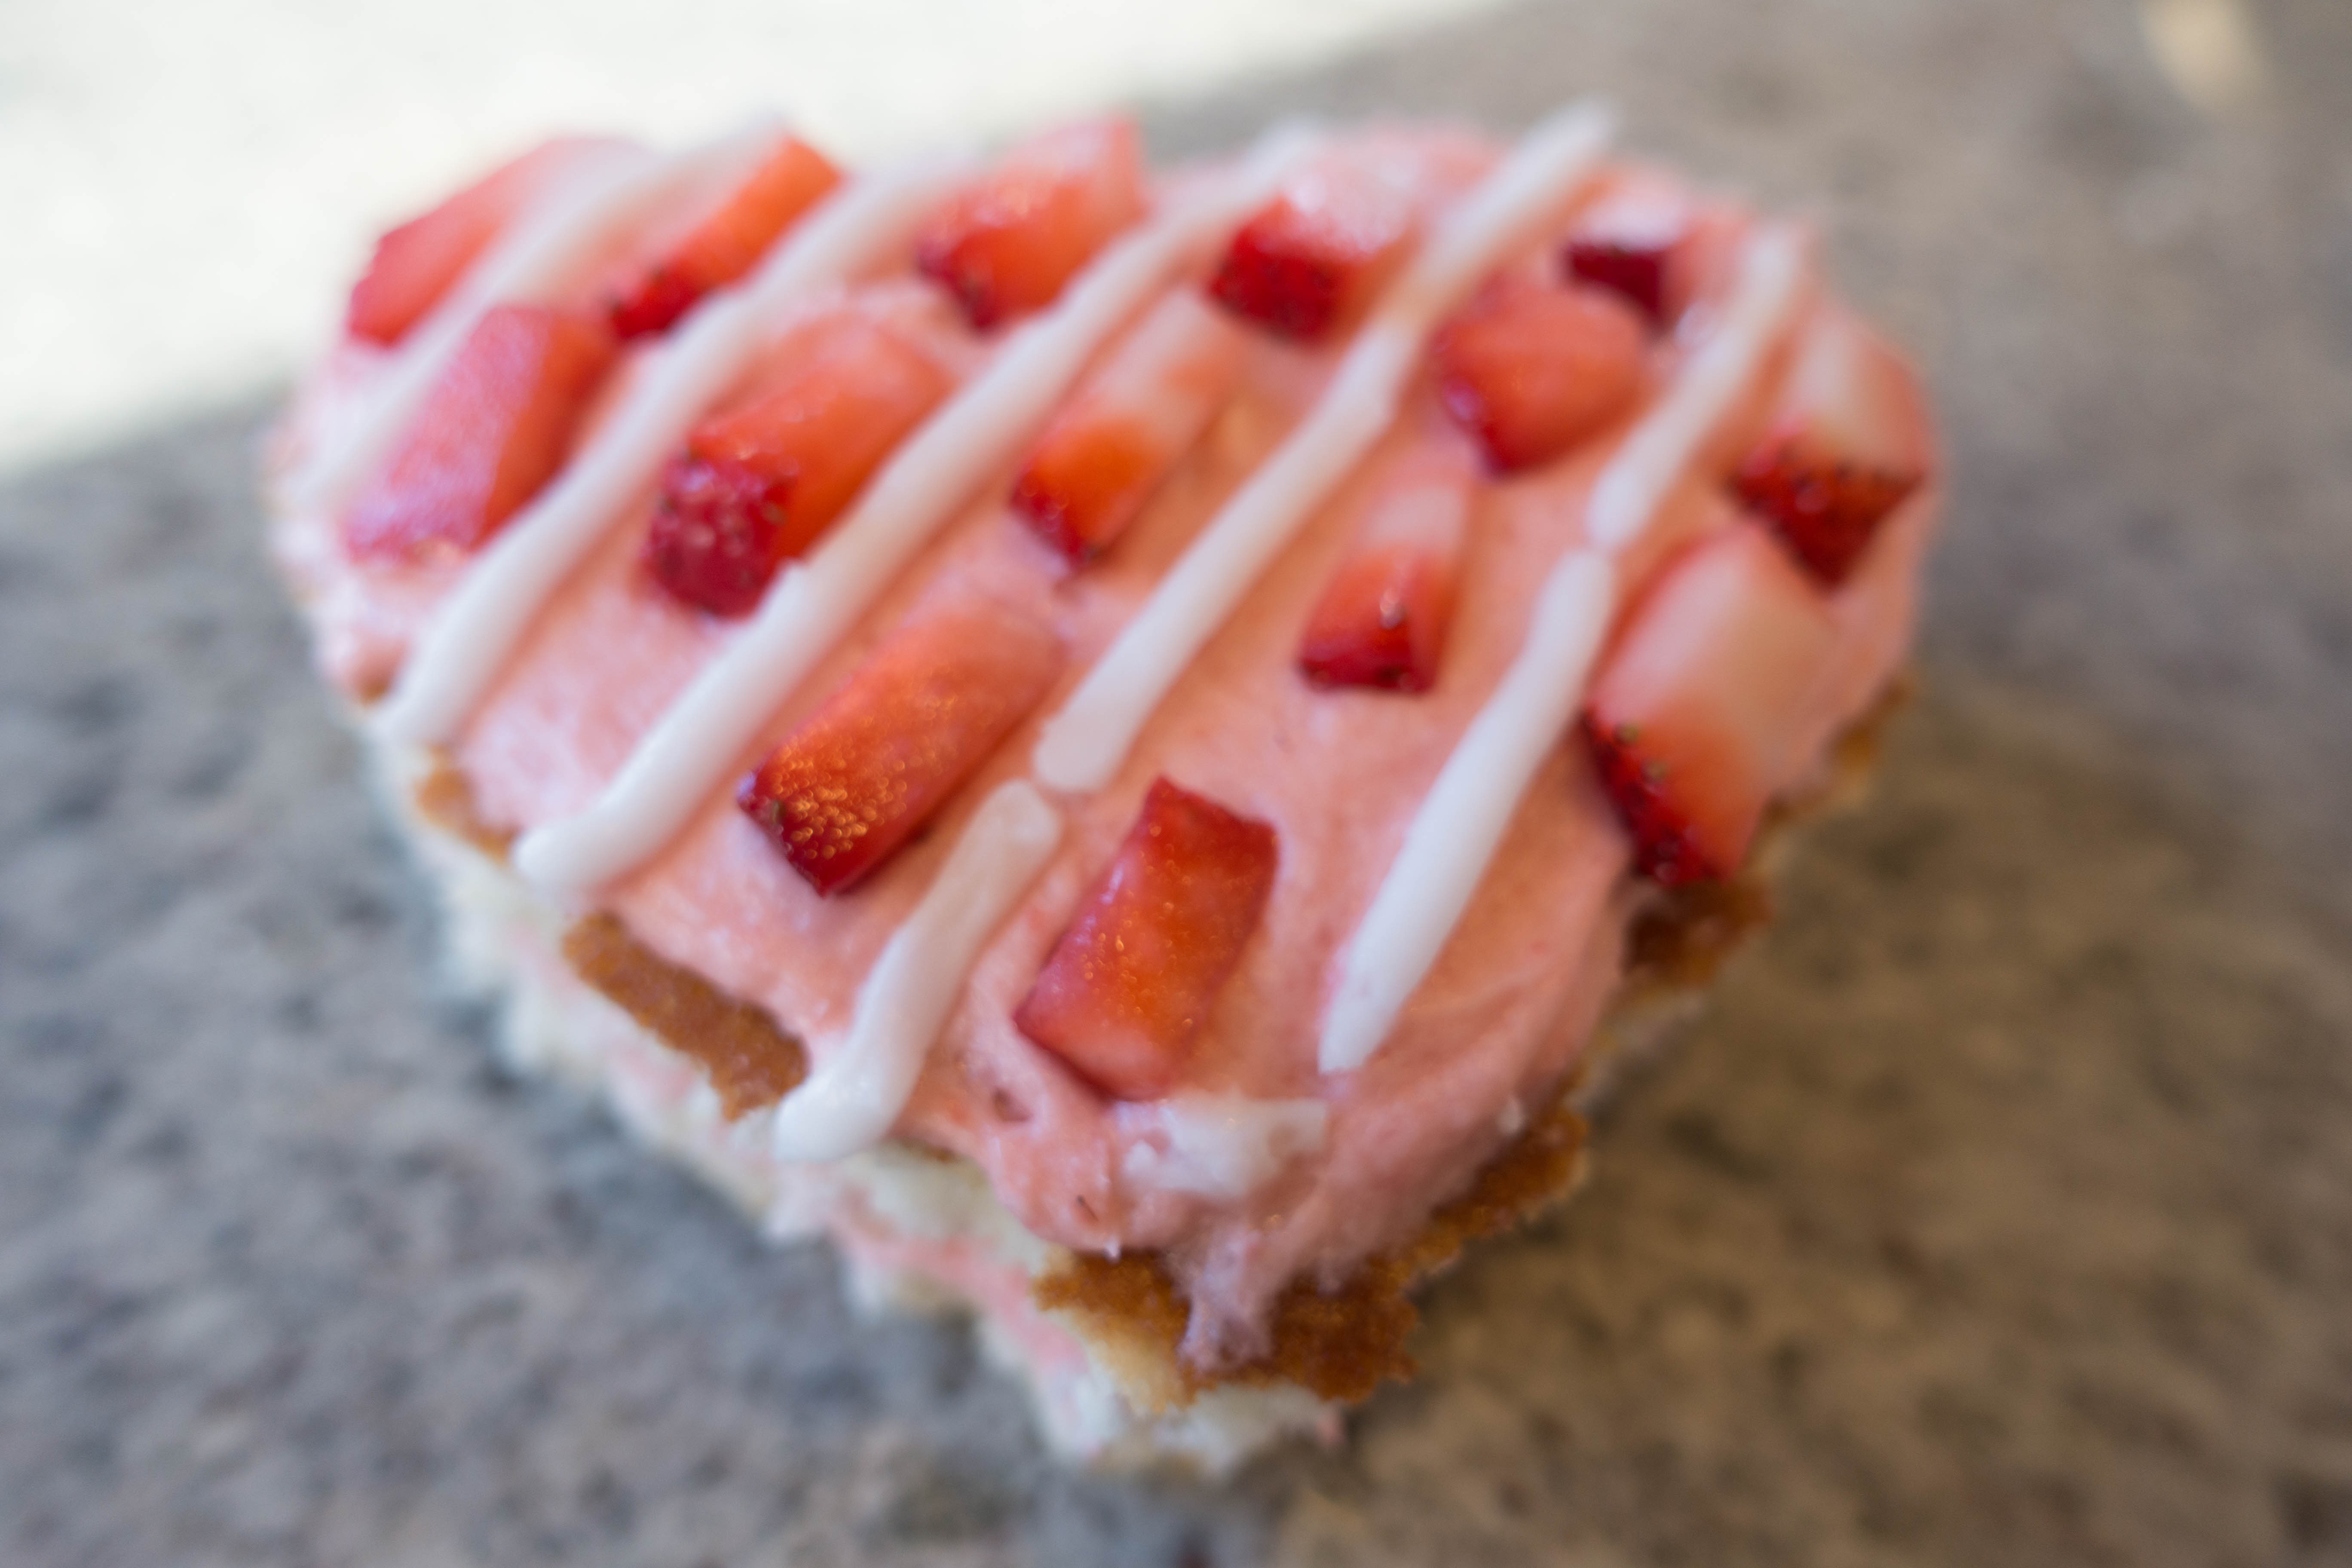
I give you Strawberry Almond Valentine Cakes! Individual of course, because WHO likes to share their desserts?
Making the Cakes
Ingredients:
- 3 1/4 cups flour
- 3 cups sugar
- 2 1/2 tsp baking powder
- 1 tsp salt
- 1 cup unsalted butter, room temperature
- 1 tsp vanilla extract
- 2 tsp almond extract
- 1 cup egg whites – about 7 large egg whites
- 1 1/2 cups buttermilk, room temperature (or 1 1/2 cups milk & 1 1/2 tbsp white vinegar)
- 1/8 cup vegetable oil
Preheat the oven to 350°F and line two 8″ round pans with parchment rounds, greasing after with non-stick cooking spray.
Mix together all the dry ingredients (flour, baking powder, sugar, and salt) in a stand mixer with the paddle attachment until fully combined.
Slowly incorporate room temperature butter into the dry mix on a low speed. During this step, your goal will be a crumb-like texture with no large pieces of butter remaining.
Add in the egg whites (I used carton whites since I didn’t have a use for yolks anytime soon), and mix on low until just incorporated. Next, mix in half the buttermilk, then the last of it, on a low speed. Finally, add in the vanilla, almond, and oil, and mixed at a low speed until smooth.
TIP: If you don’t have buttermilk on hand, you can use milk and white vinegar to get the same result!
Pour the batter evenly between the prepared cake pans, and place them in the oven to bake for 35-37 minutes (or until a toothpick comes out clean).
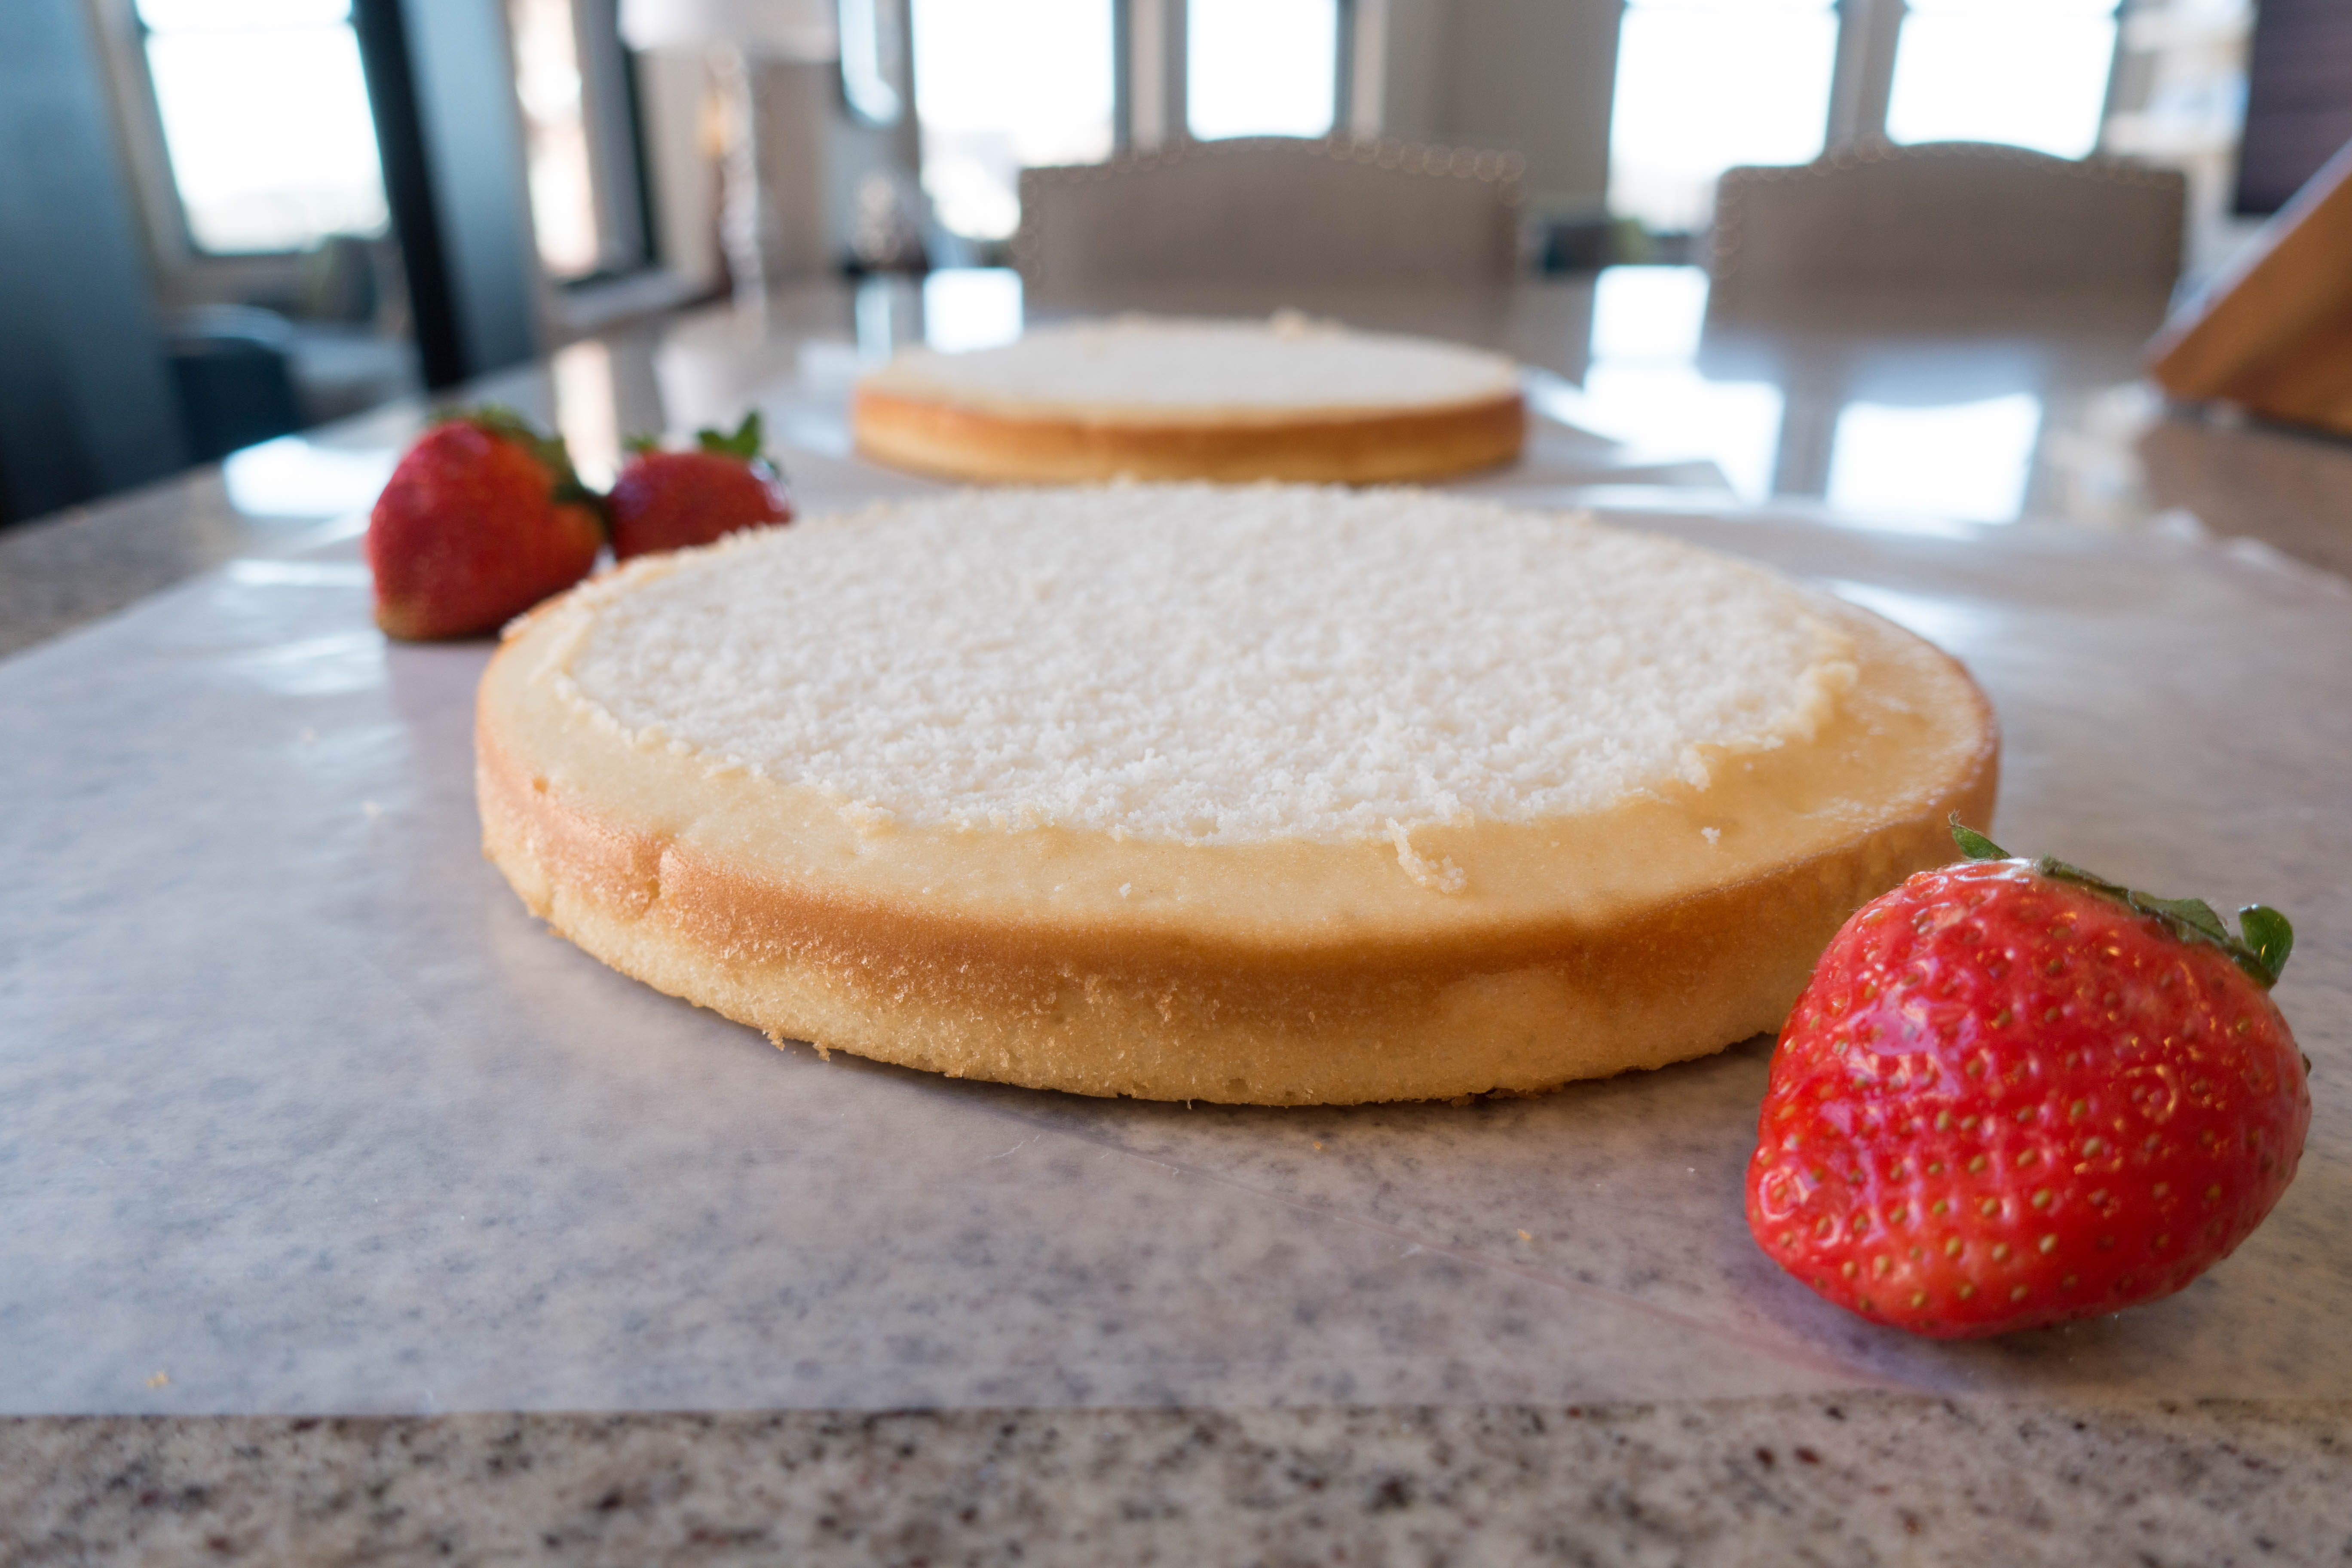
Allow the cakes to cool for 10 minutes, then run a thin silicone spatula around edges of the pan to separate the cake from the pan. Doing this any sooner than 10 minutes could result in a cake break- set a timer and don’t rush this stage!
TIP: Baking the cakes a day in advance and keeping them in the fridge overnight creates the best possible situation for cutting/decorating. If you don’t have time, pop them in the freezer for about 45 minutes!
Transfer the cooled cakes to either a floured rolling mat or parchment paper-covered counter top for cutting!
Since the individual cakes are going to be rather small, it is important that they are as level and even as possible. An easy tool to use for fine-tuning is a layer cutter. If you don’t feel like having an extra gadget around the house, a bread knife will also work, it just may take a bit more time and eyeballing 🙂 Once the layers are level, cut them using a cookie cutter.
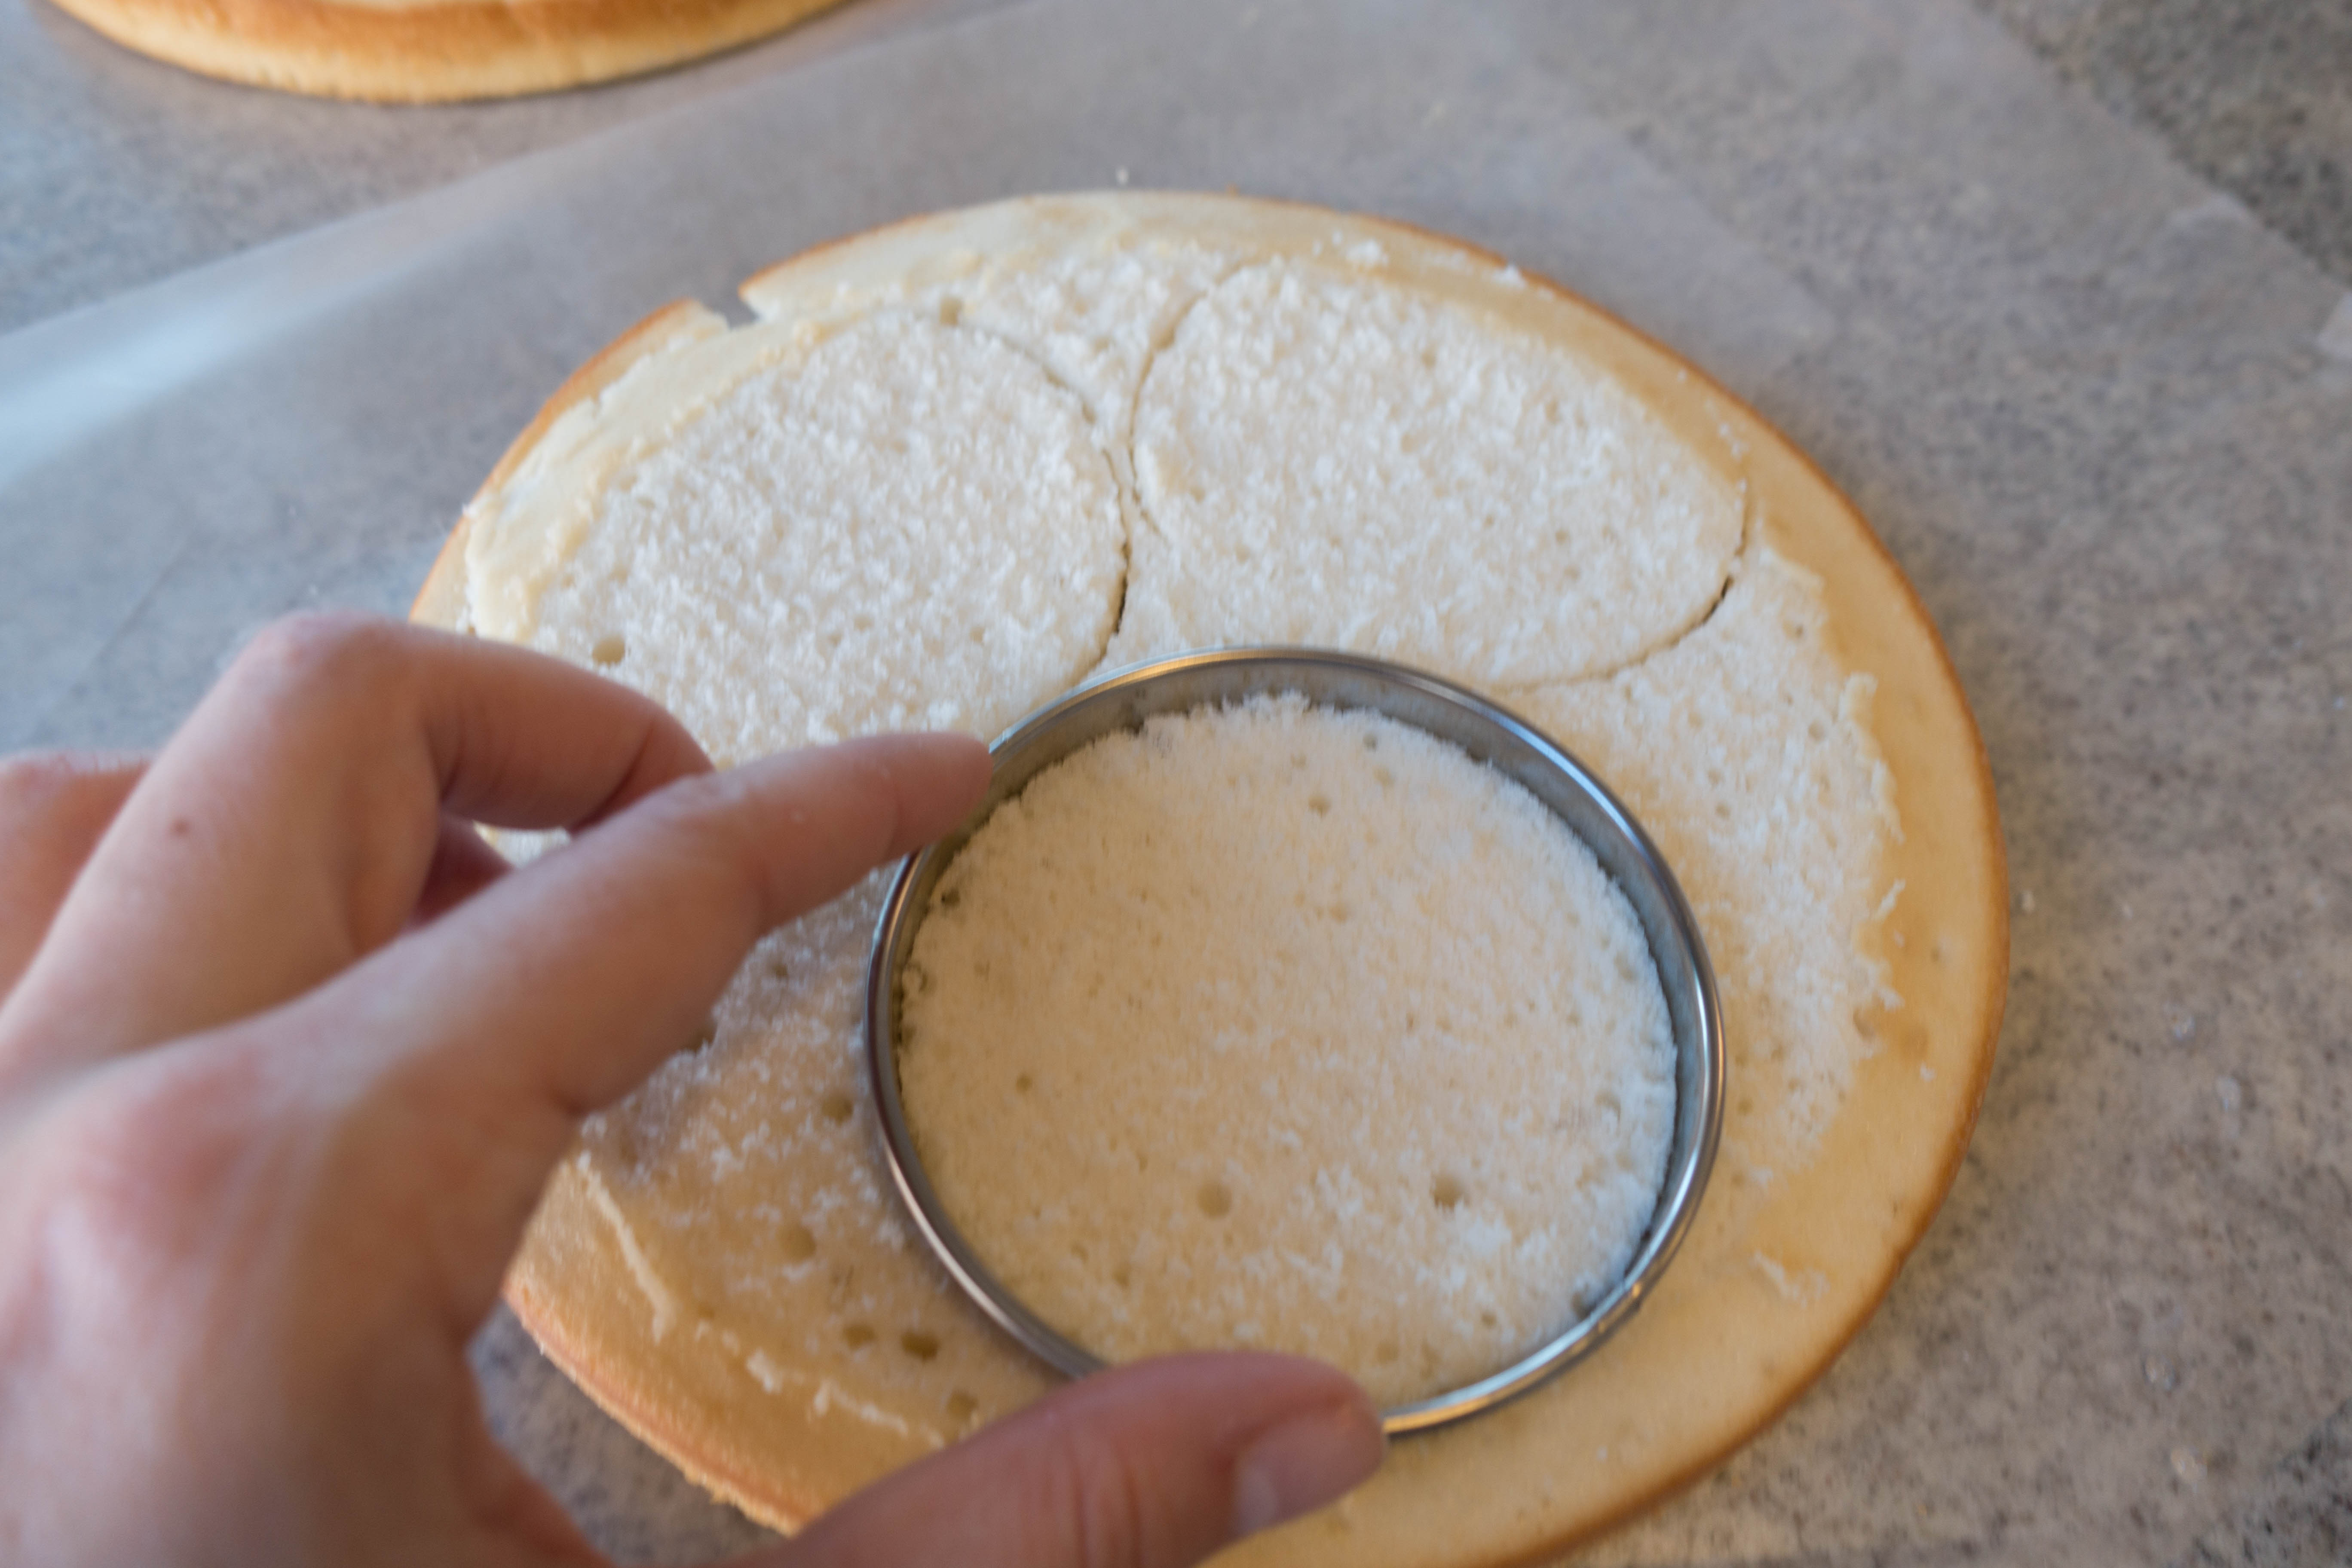
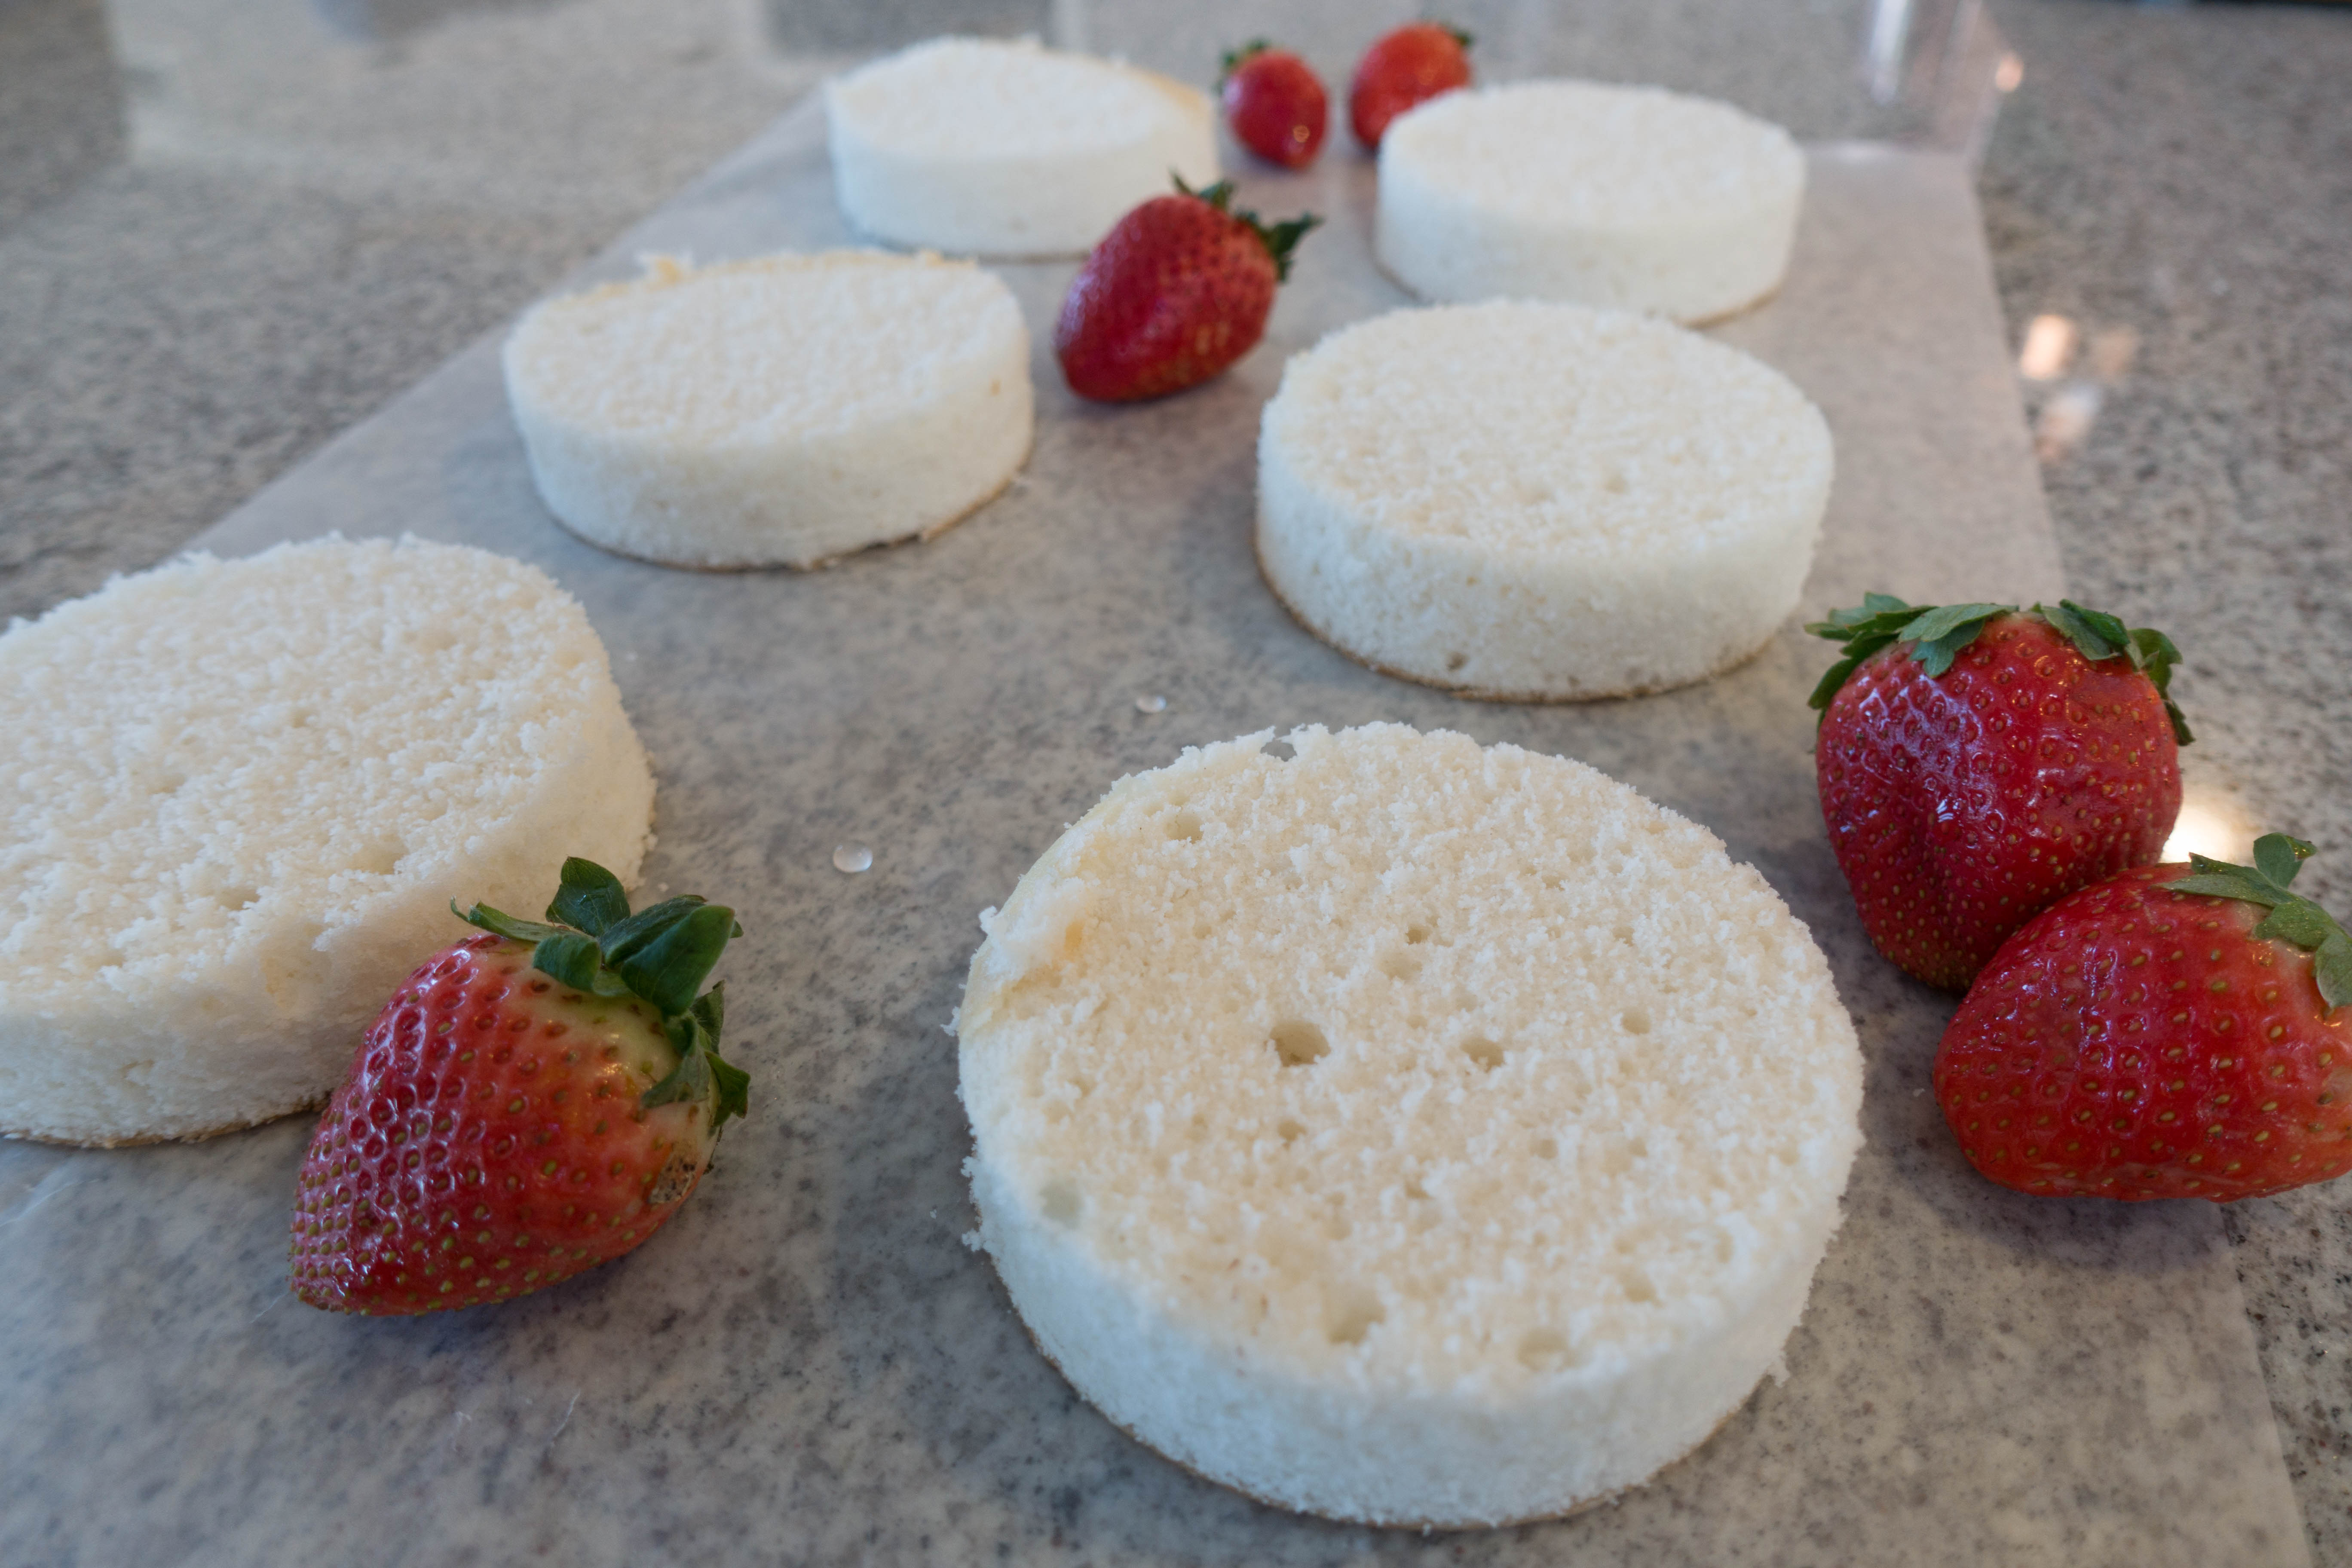
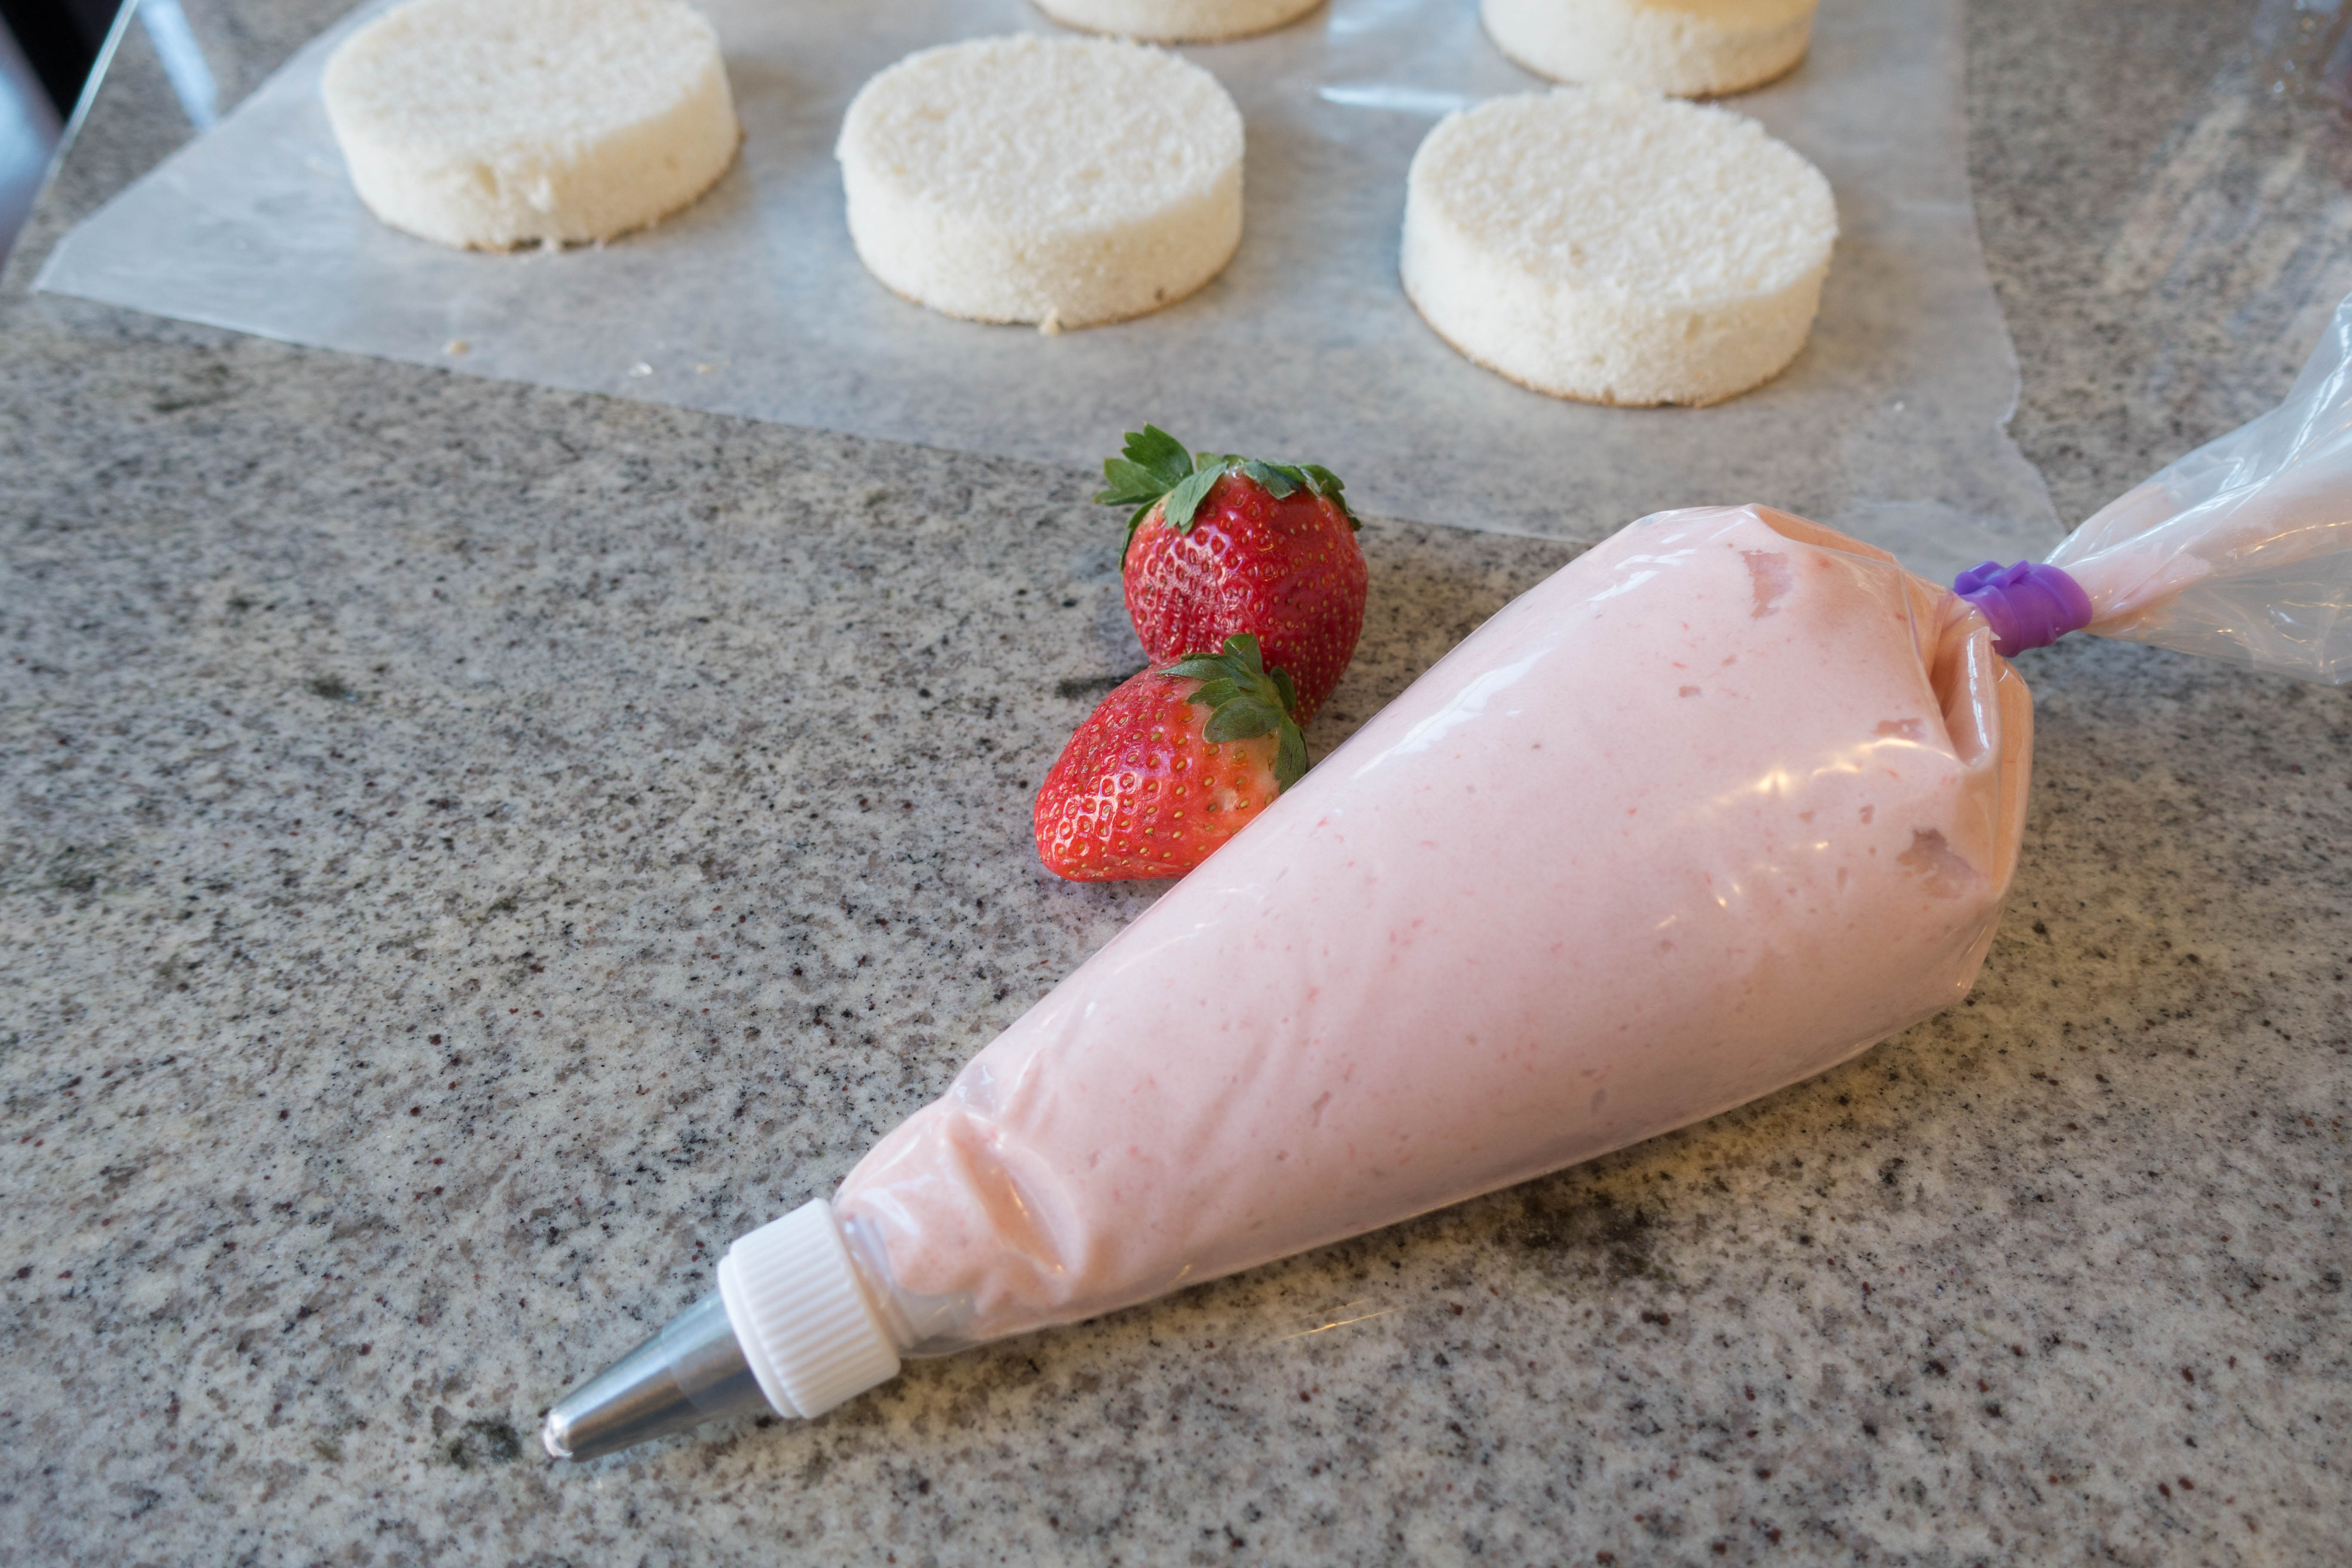
The amount of individual cakes you end up with obviously is a direct result of the size of cutter you use. My cutter was 3″ in diameter, resulting in 6 layer pieces, enough for 3 individual cakes.

| Prep Time | 20 minutes |
| Cook Time | 35 minutes |
| Servings |
9" layers
|
- 3 1/4 cups flour
- 3 cups sugar
- 2 1/2 tsp baking powder
- 1 tsp salt
- 1 cup unsalted butter room temperature
- 1 tsp vanilla extract
- 2 tsp almond extract
- 1 cup egg whites or 7 large egg whites
- 1 1/2 cups buttermilk or 1 1/2 cup milk & 1 1/2 tbsp white vinegar
- 1/8 cup vegetable oil
Ingredients
|
|
- Preheat the oven to 350°F and line two 8″ round pans with parchment rounds, greasing after with non-stick cooking spray.
- Mix together all the dry ingredients (flour, baking powder, sugar, and salt) in a stand mixer with the paddle attachment until fully combined.
- Slowly incorporate room temperature butter into the dry mix on a low speed to obtain a crumb-like texture.
- Add in the egg whites and mix on low until just incorporated.
- Mix in half the buttermilk, then the last of it, on a low speed.
- Add in the vanilla, almond, and oil, and mixed at a low speed until smooth.
- Pour batter into prepared cake pans, and place them in the oven to bake for 35-37 minutes (or until a toothpick comes out clean).
- Allow the cakes to cool for 10 minutes, then run a thin spatula around edges of the pan to separate the cake from the pan.
Making the Strawberry Buttercream
Ingredients:
- 12 oz fresh strawberries
- 1 cup unsalted butter, room temperature
- 4 1/2 to 5 cups powdered sugar, sifted
- 1/4 tsp vanilla extract
- 1/4 tsp salt
The strawberry buttercream recipe I found called heavy cream to be added at the end. Since I knew I wanted a firmer frosting, I left this ingredient out. This allowed my cake layers to remain a bit separated to showcase the pink, as well as to stack properly.
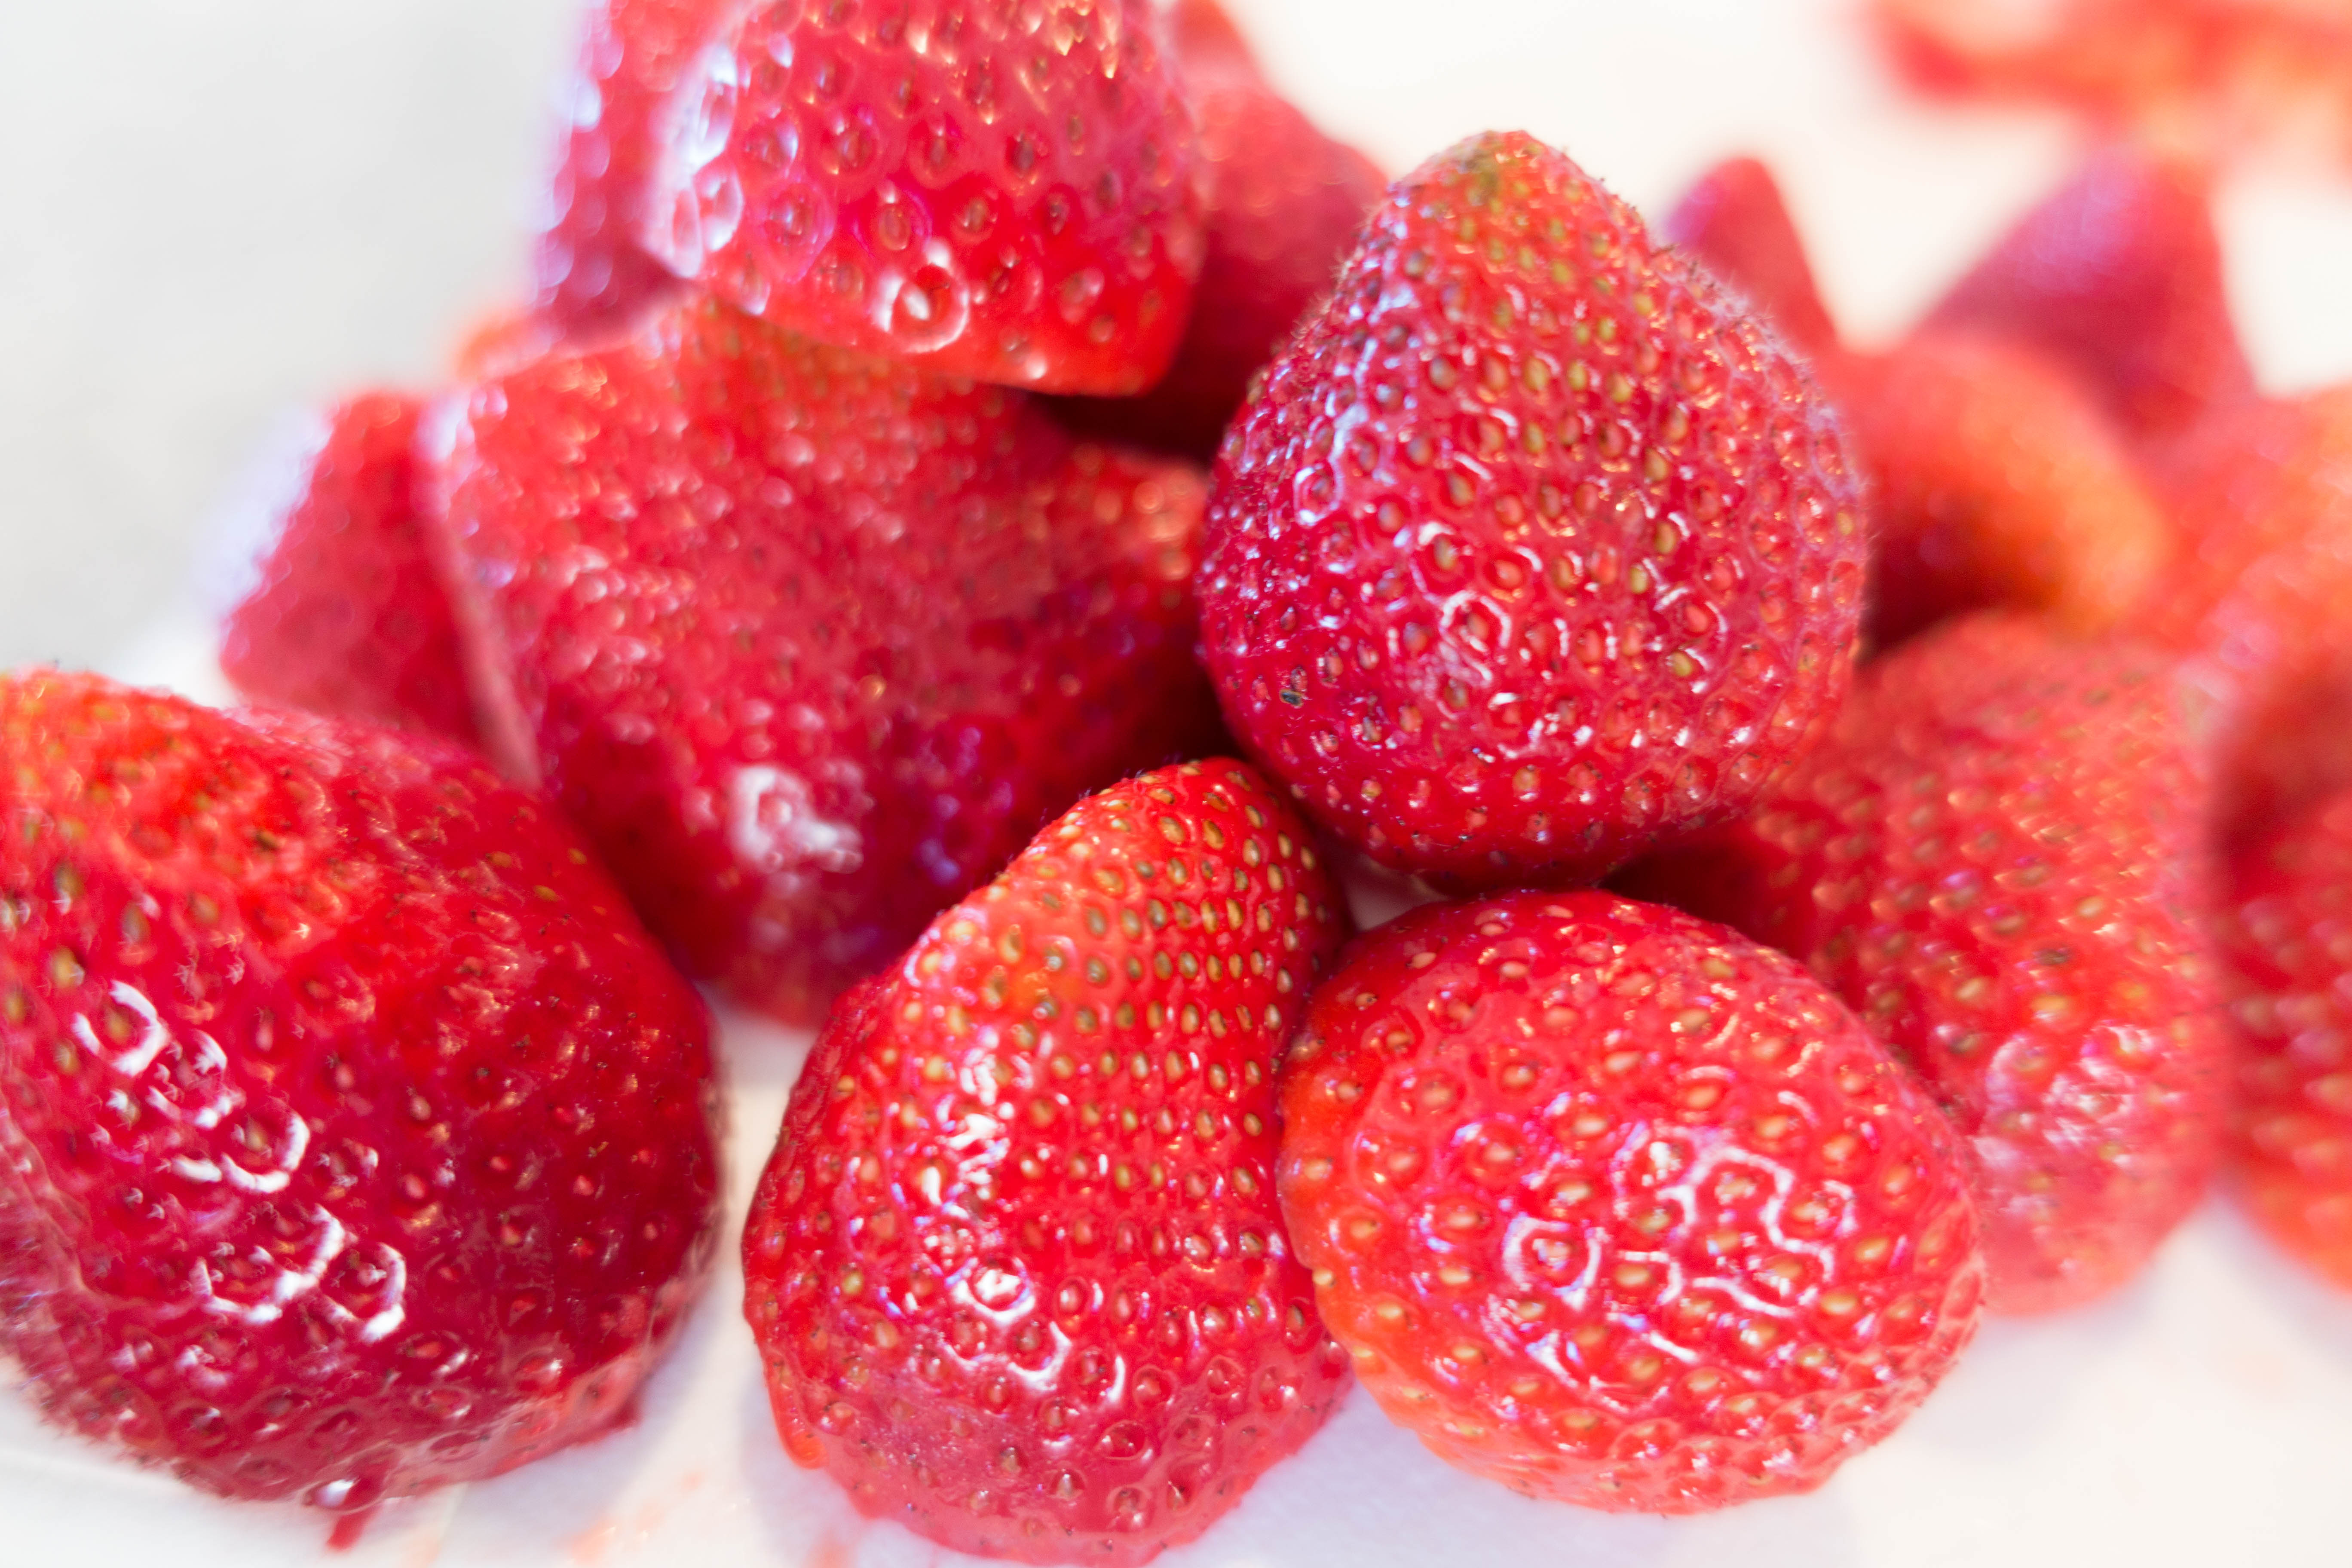
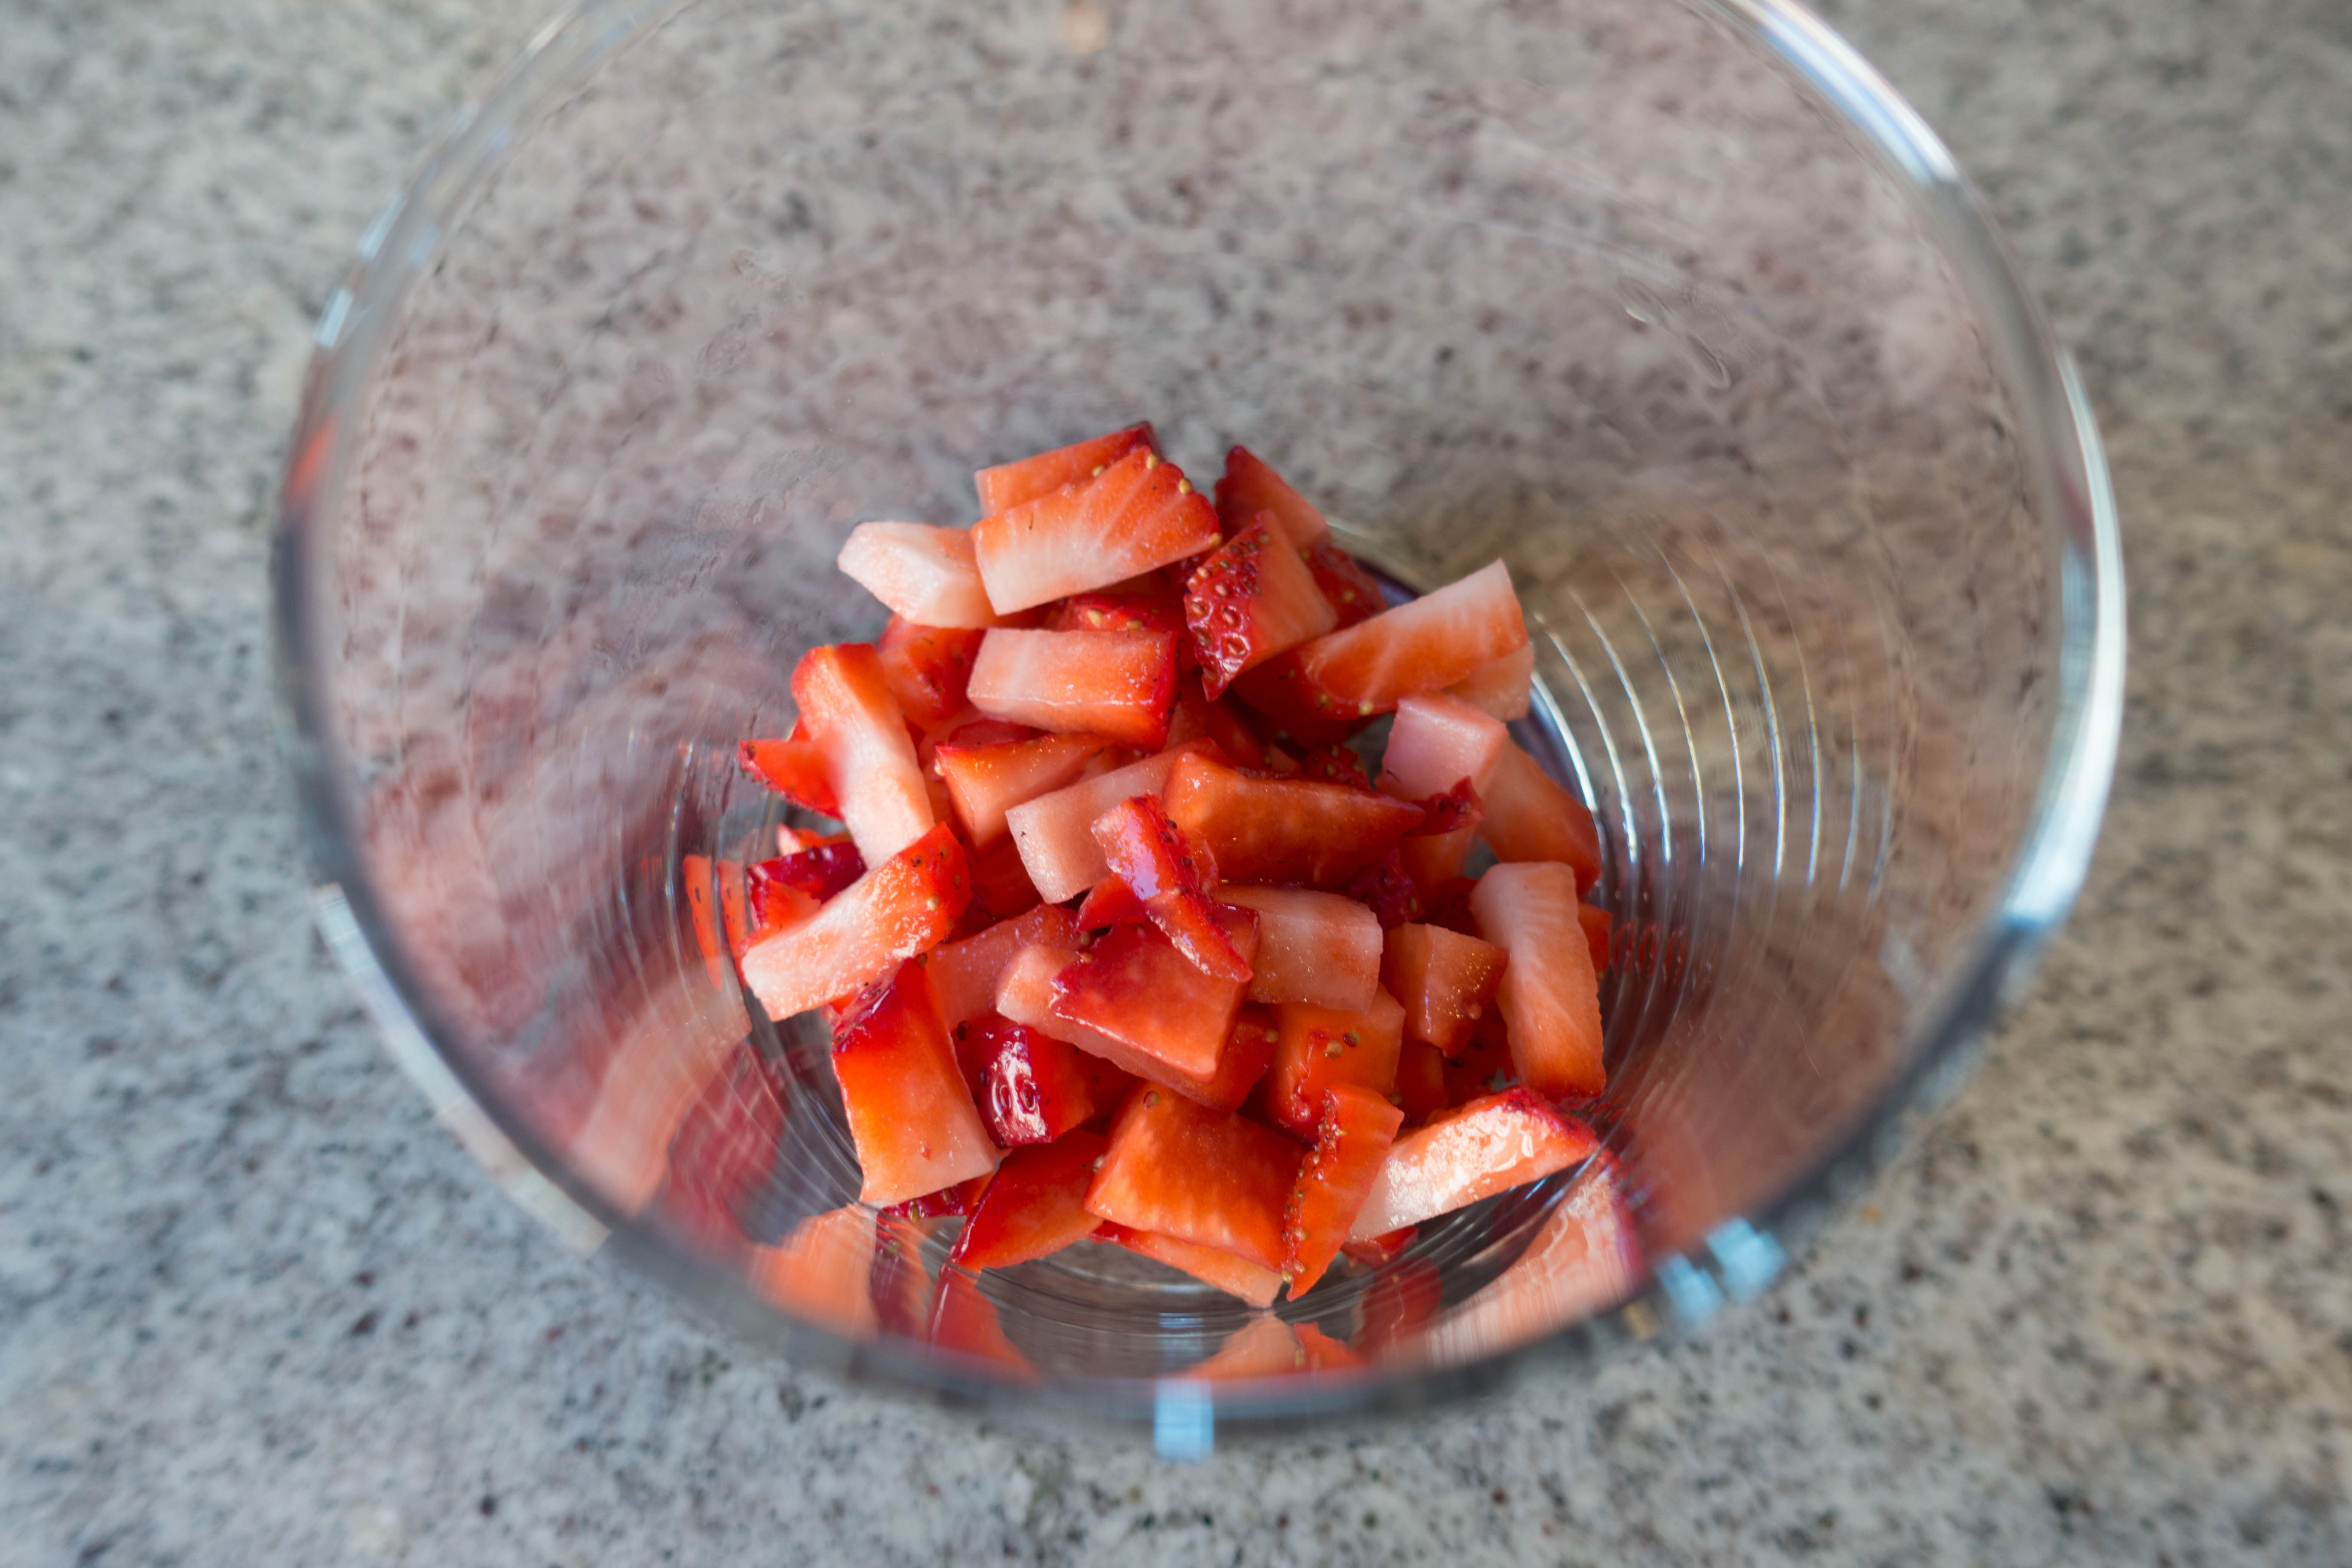
First, wash and core the strawberries, removing the white centers.
Place the prepped berries into a blender or food processor and pulse until smooth. My Vitamix gave me about 1 and 1/2 cups of strawberry puree.
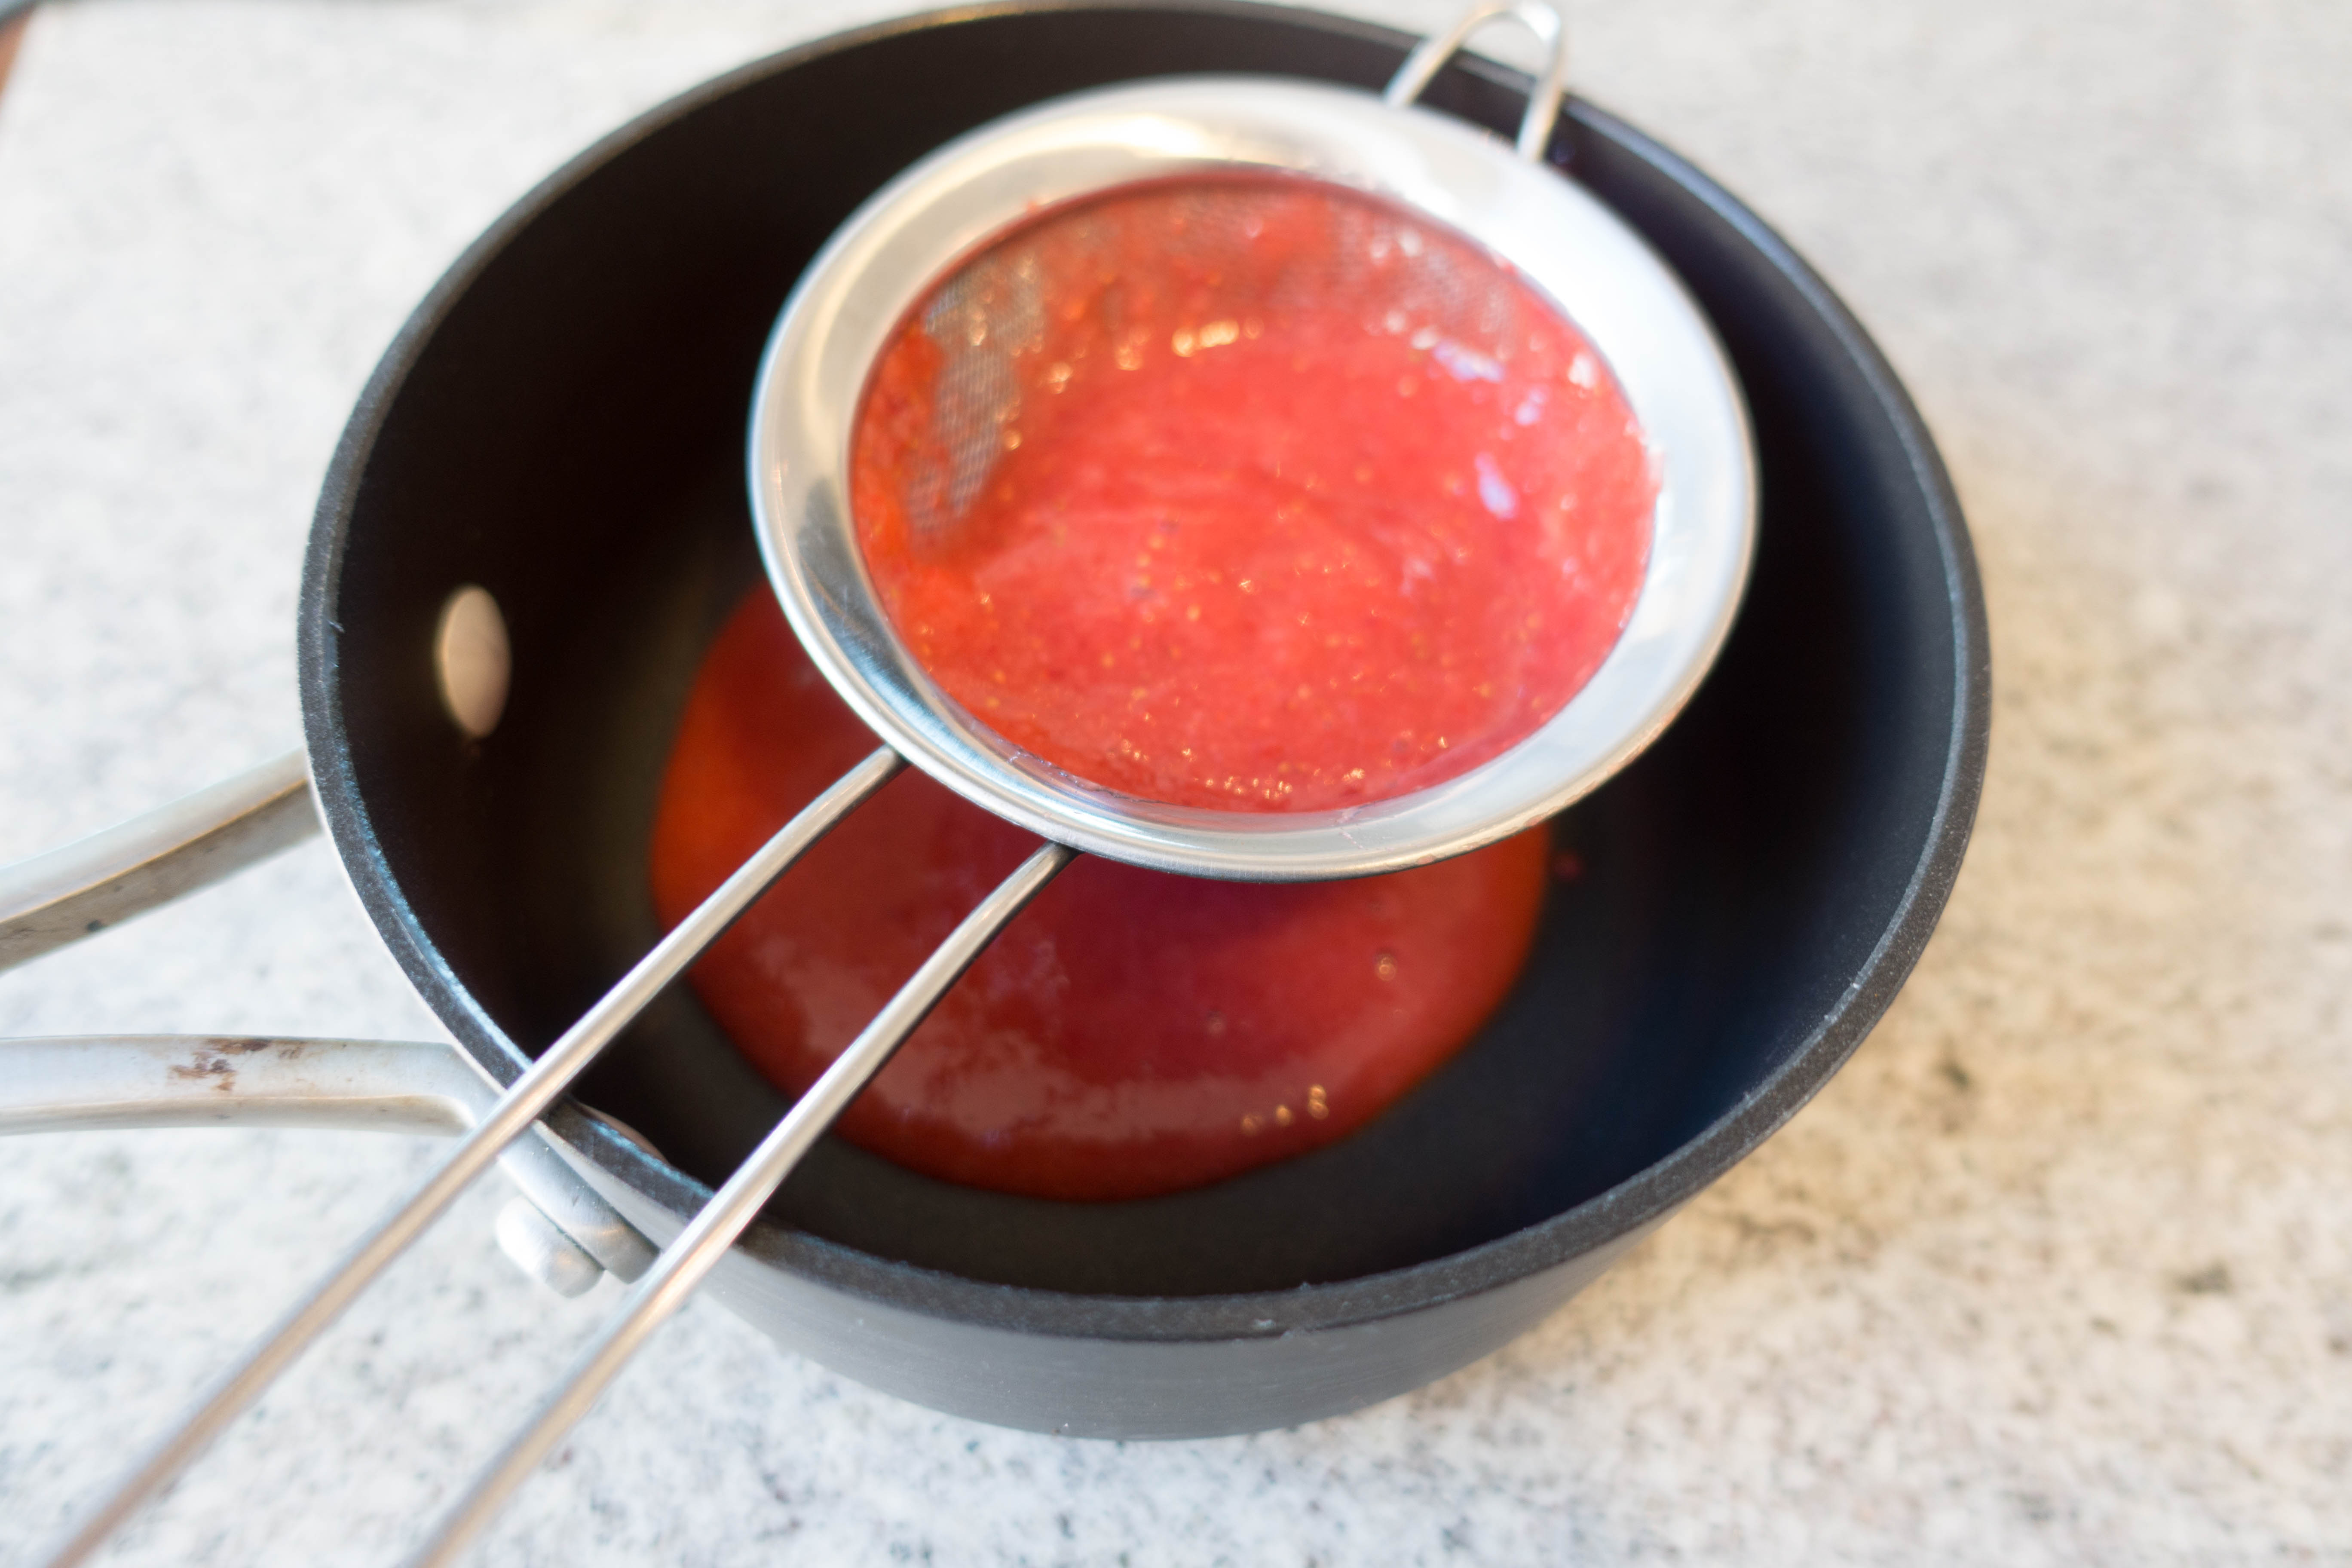
Pour the puree through a strainer about 1/3 cup at a time to remove the seeds. This is not required, but I didn’t want any seeds in my frosting for this treat.
Pour the puree through a strainer about 1/3 cup at a time to remove the seeds. This isn’t necessary, but I didn’t want any seeds in my treats.
Add the strained/unstrained the puree into a medium saucepan over low-medium heat and bring to a gentle boil (stirring occasionally). It is important to continue boiling until it reduces to at least 1/4 of the original volume- this will ensure the proper thickness.
Pop the reduced strawberry puree into the fridge or freezer and cool completely (about 30 minutes in the fridge).
In a stand mixer on medium speed, beat the butter until fluffy and smooth (no lumps!) Switch the mixer down to a low speed and carefully beat in 2 and 1/2 cups of the powdered sugar.
Check to be sure your strawberry puree is cold, then add 3-4 tablespoons into the frosting along with the vanilla and salt. Beat together at medium speed until combined. At this point the mixture will look quite uneven- don’t stress!
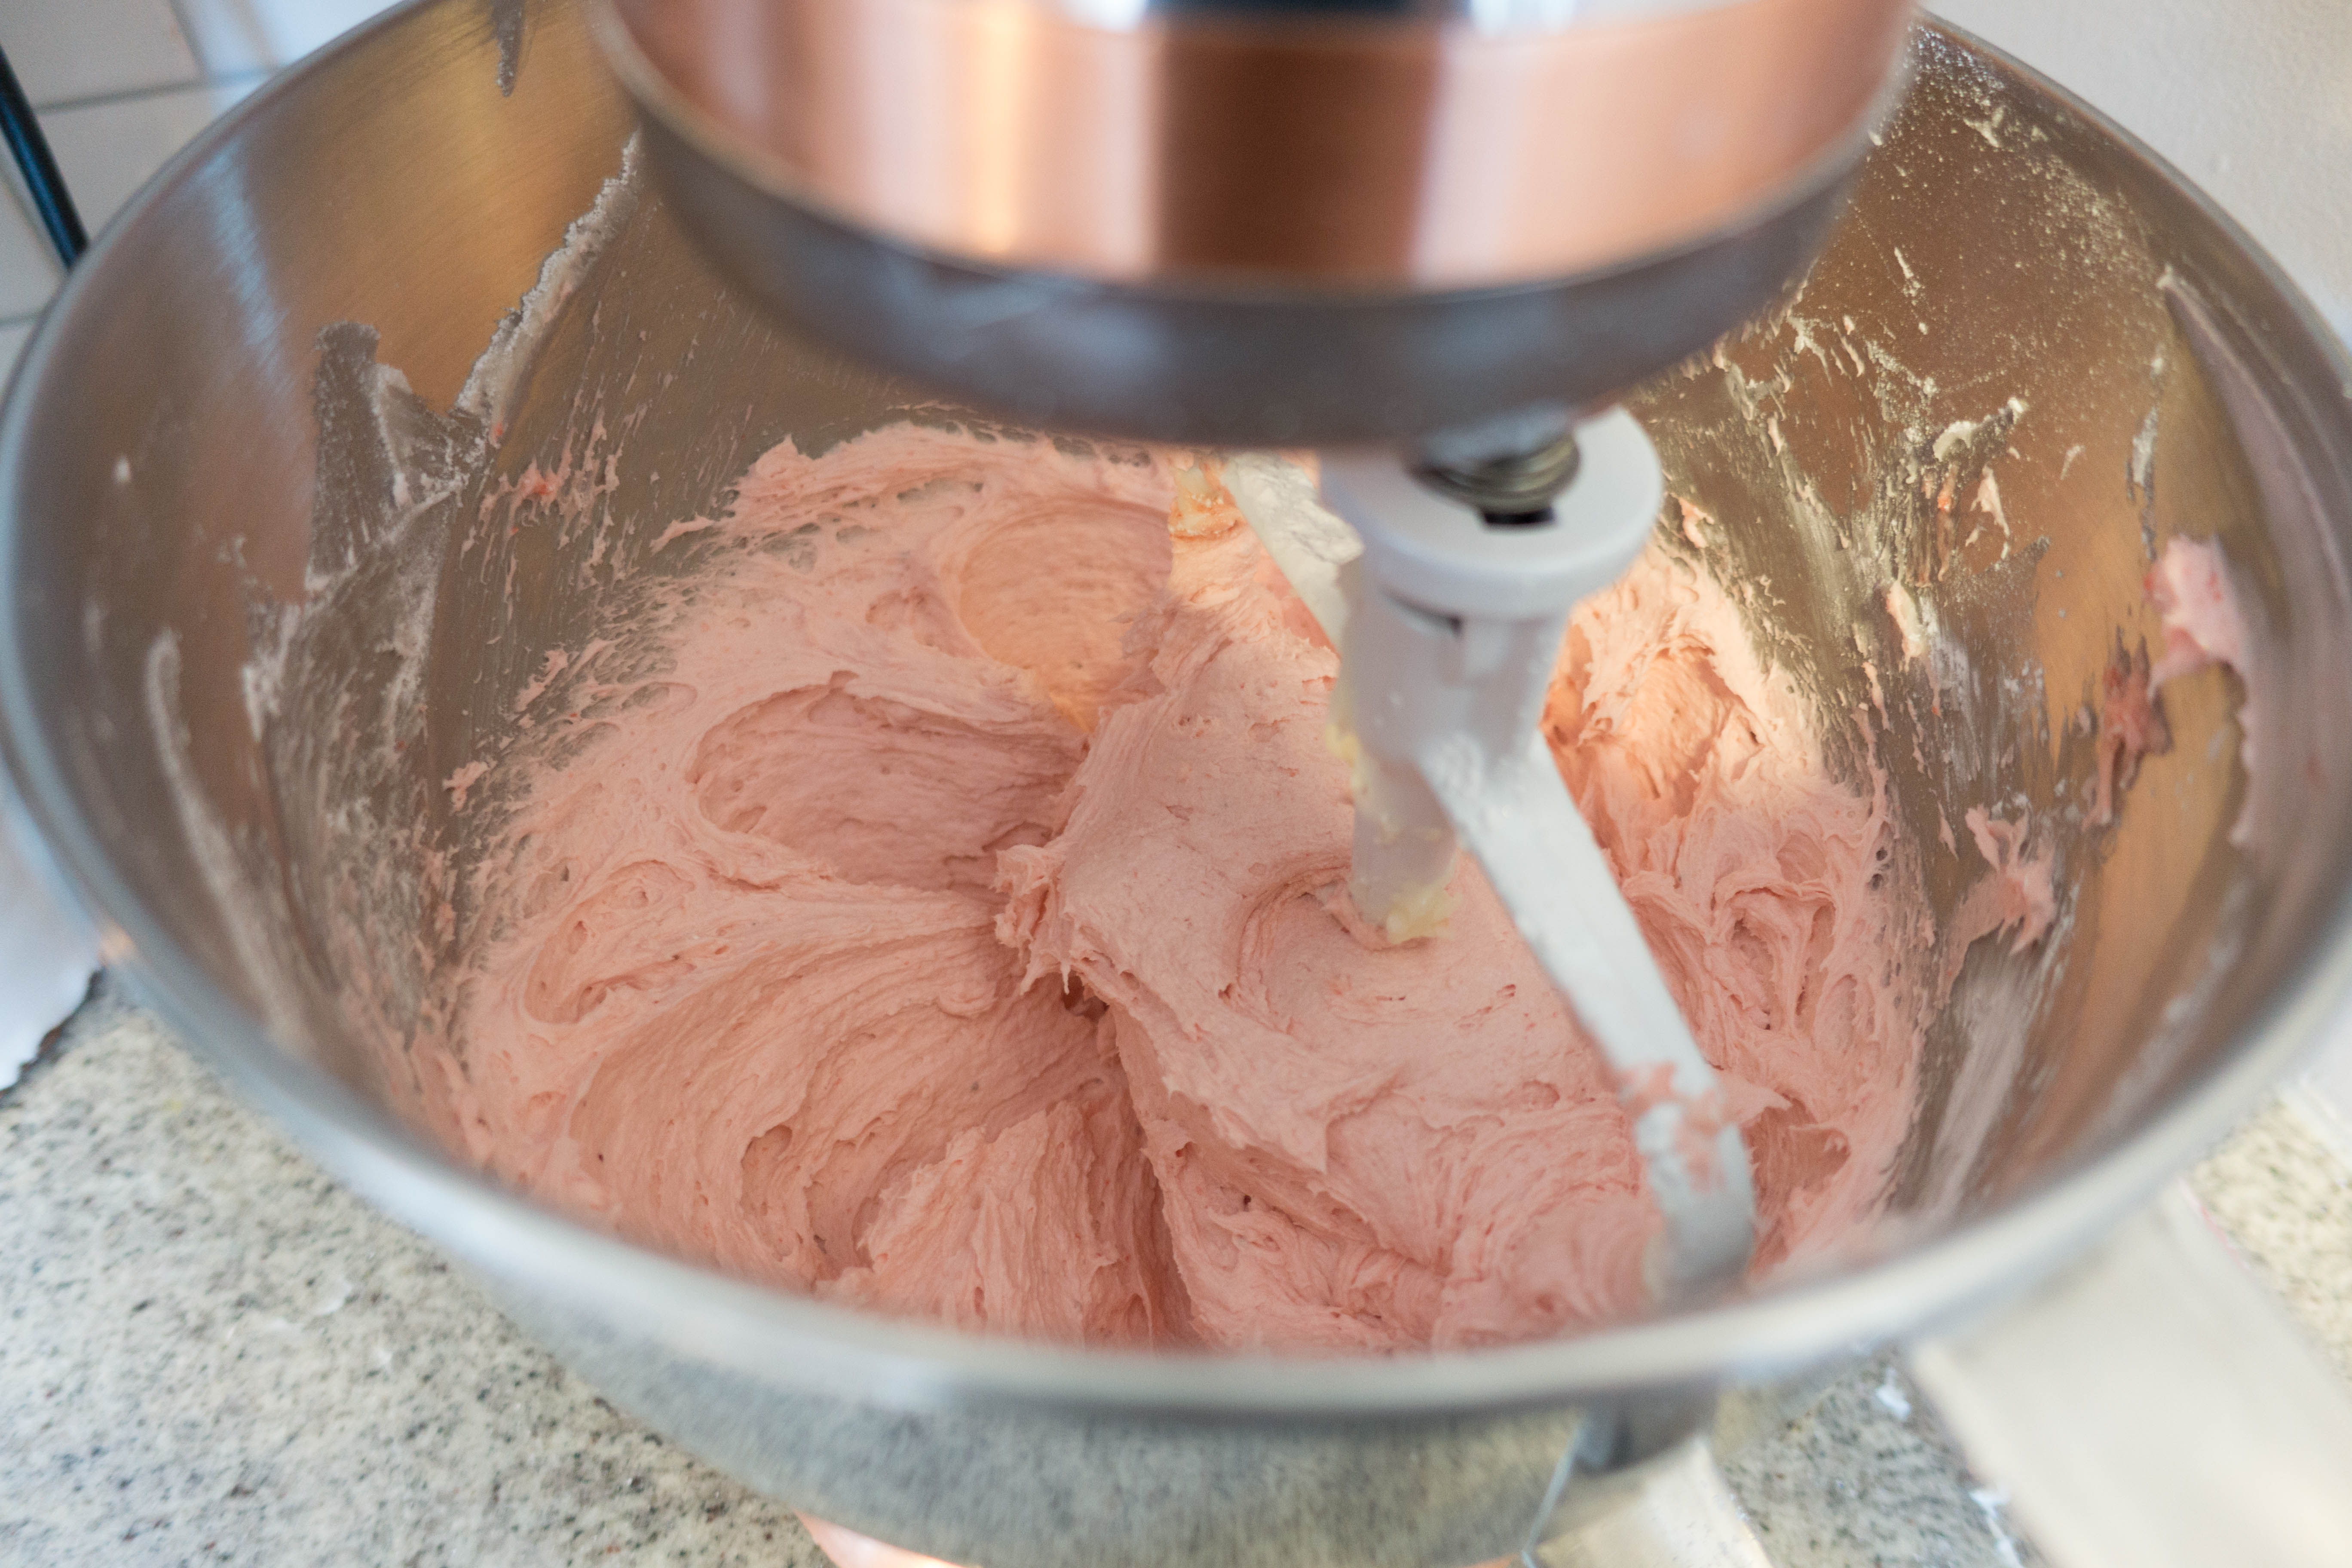
Add in the rest of the powdered sugar on low speed. Once combined, turn the mixer to medium-high speed and beat it until fluffy. Beat in a little extra powdered sugar as needed.

| Prep Time | 40 minutes |
| Servings |
cake
|
- 12 oz fresh strawberries
- 1 cup unsalted butter room temperature
- 5 cups powdered sugar
- 1/4 tsp vanilla extract
- 1/4 tsp salt
Ingredients
|
|
- Wash and core the strawberries, removing the white centers.
- Place berries into a blender or food processor and pulse until smooth.
- Pour the puree through a strainer about 1/3 cup at a time to remove the seeds.
- Add the strained/unstrained the puree into a medium saucepan over low-medium heat and bring to a gentle boil (stirring occasionally).
- Place the reduced strawberry puree into the fridge or freezer and cool completely.
- In a stand mixer on medium speed, beat the butter until fluffy and smooth. Switch the mixer down to a low speed and carefully beat in 2 and 1/2 cups of the powdered sugar.
- Add 3-4 tablespoons cold puree into the frosting along with the vanilla and salt. Beat together at medium speed until combined.
- Add in the rest of the powdered sugar on low speed. Once combined, turn the mixer to medium-high speed and beat it until fluffy.
Add extra powdered sugar as needed (to harden the consistency of your buttercream).
Putting it Together
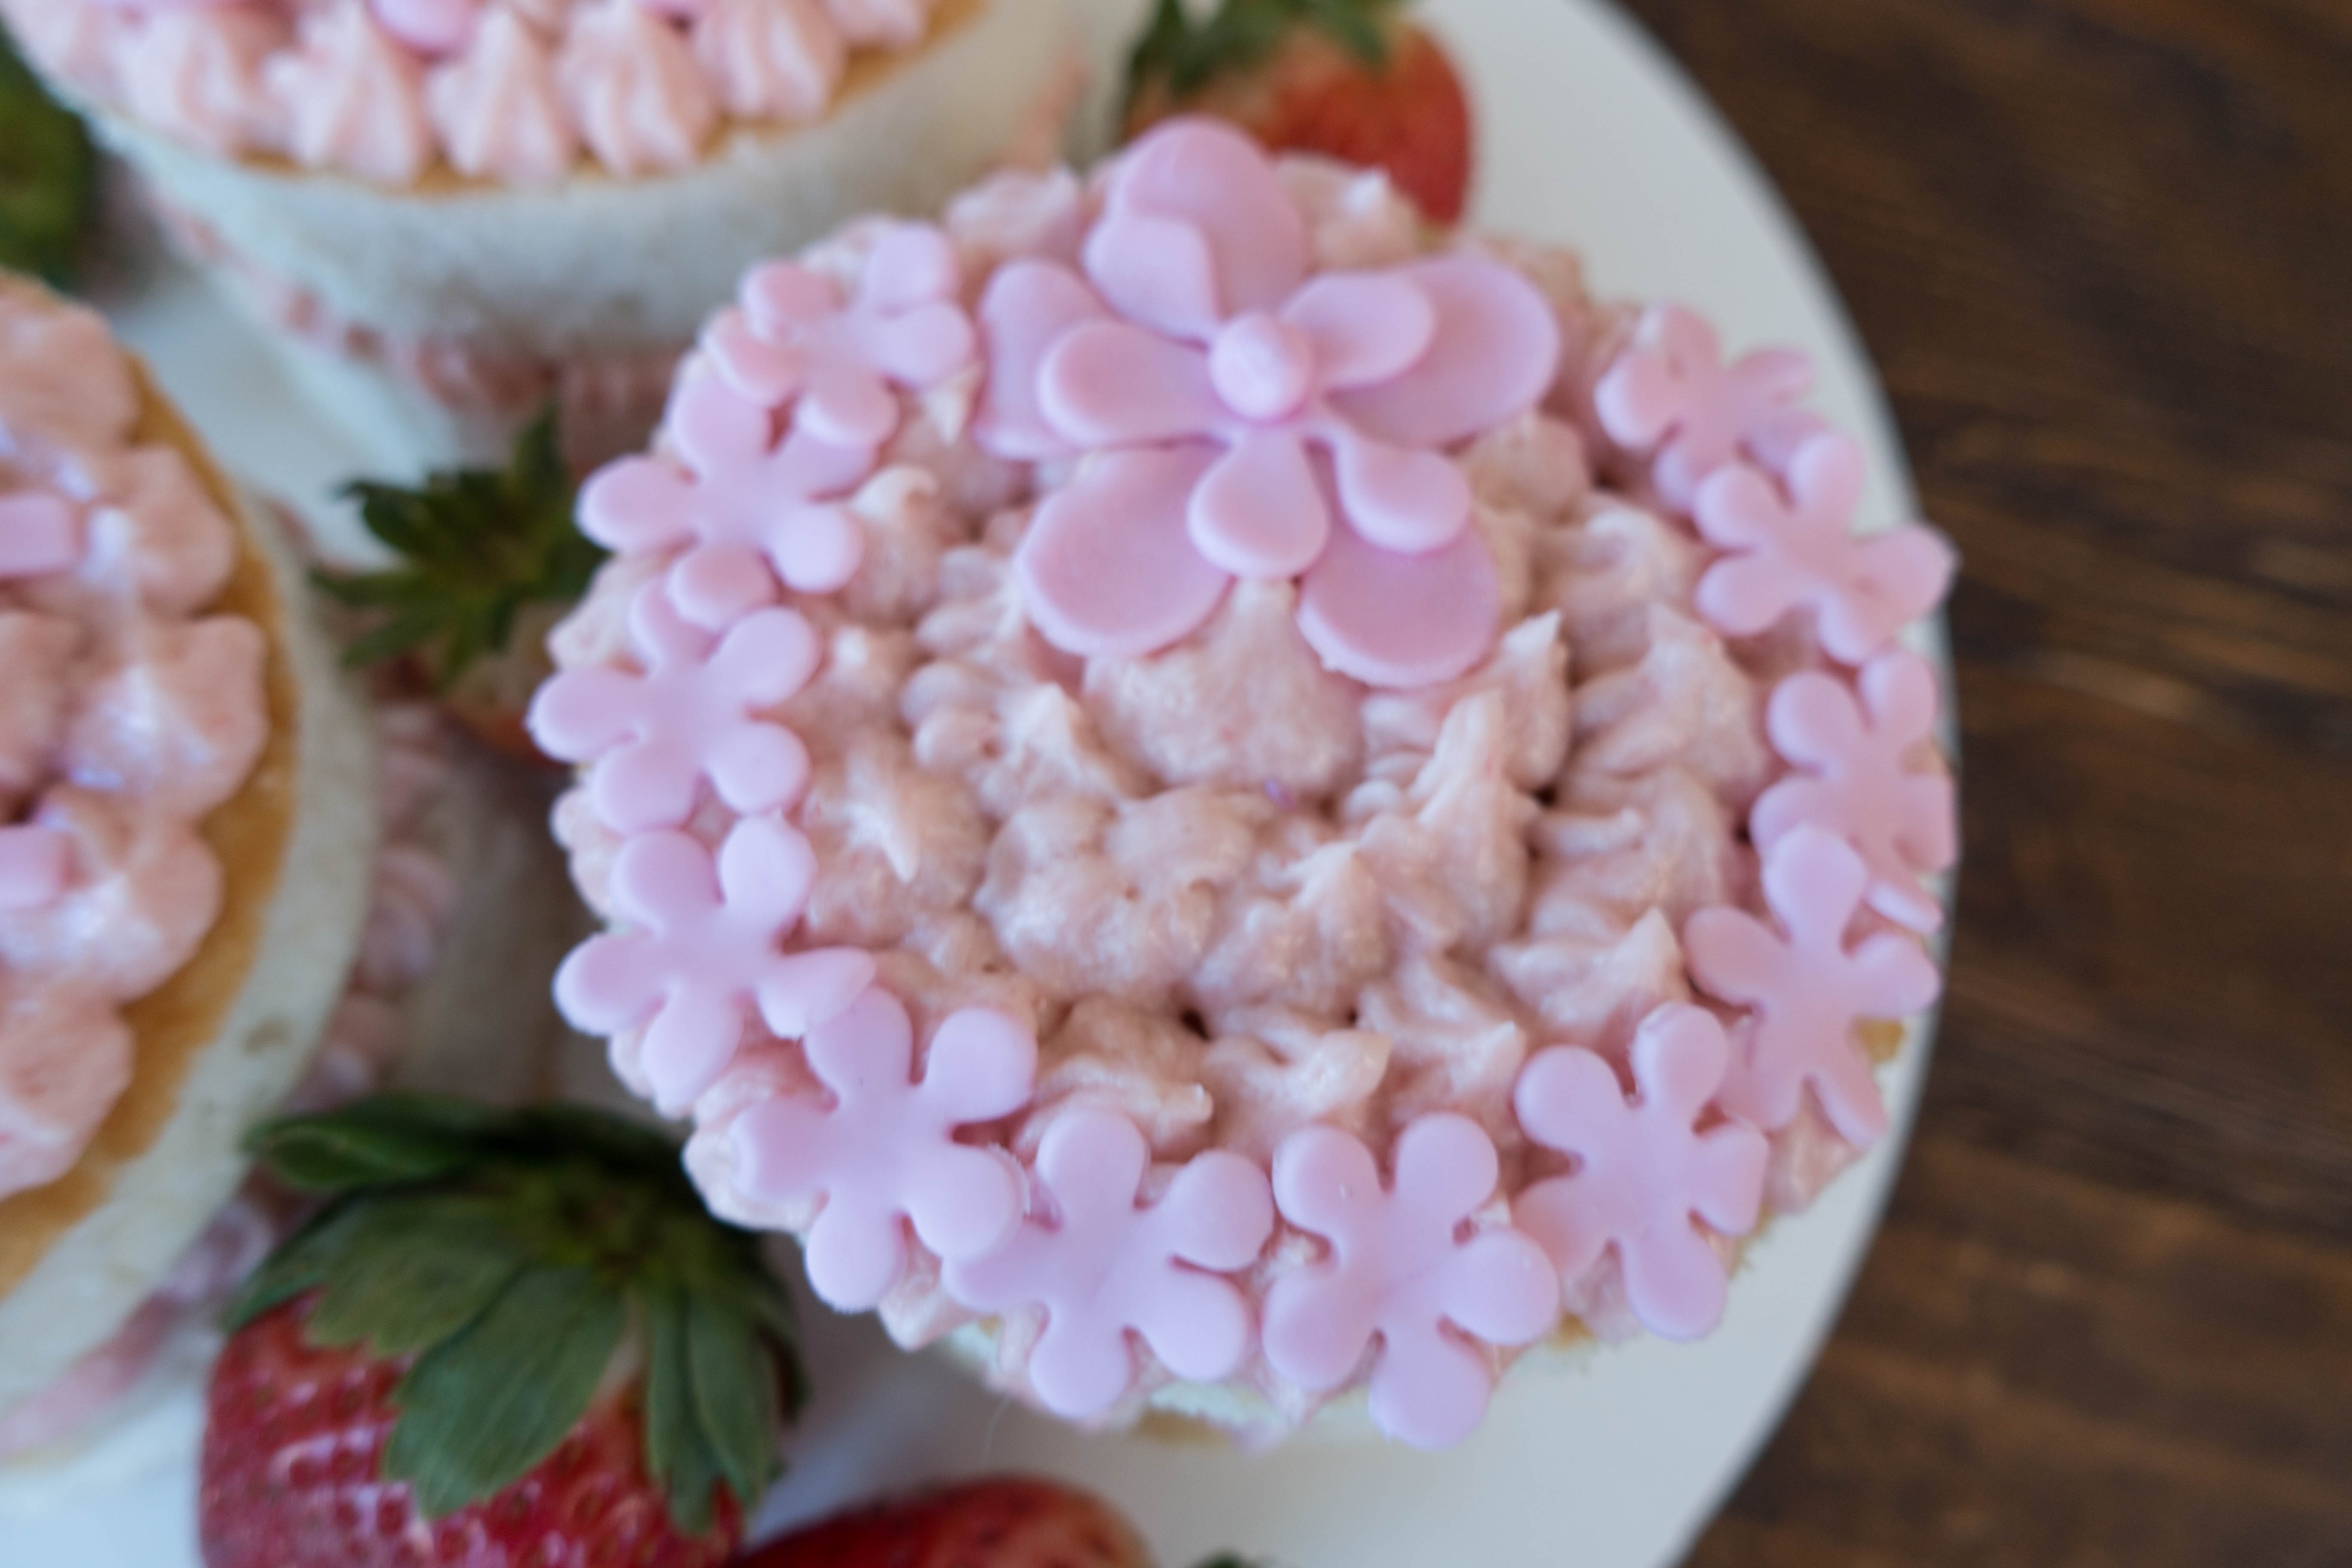
The fun part! Now that you have the cutest individual cakes and the most pink and yummy frosting, it’s time to put it all together and impress your Valentine.
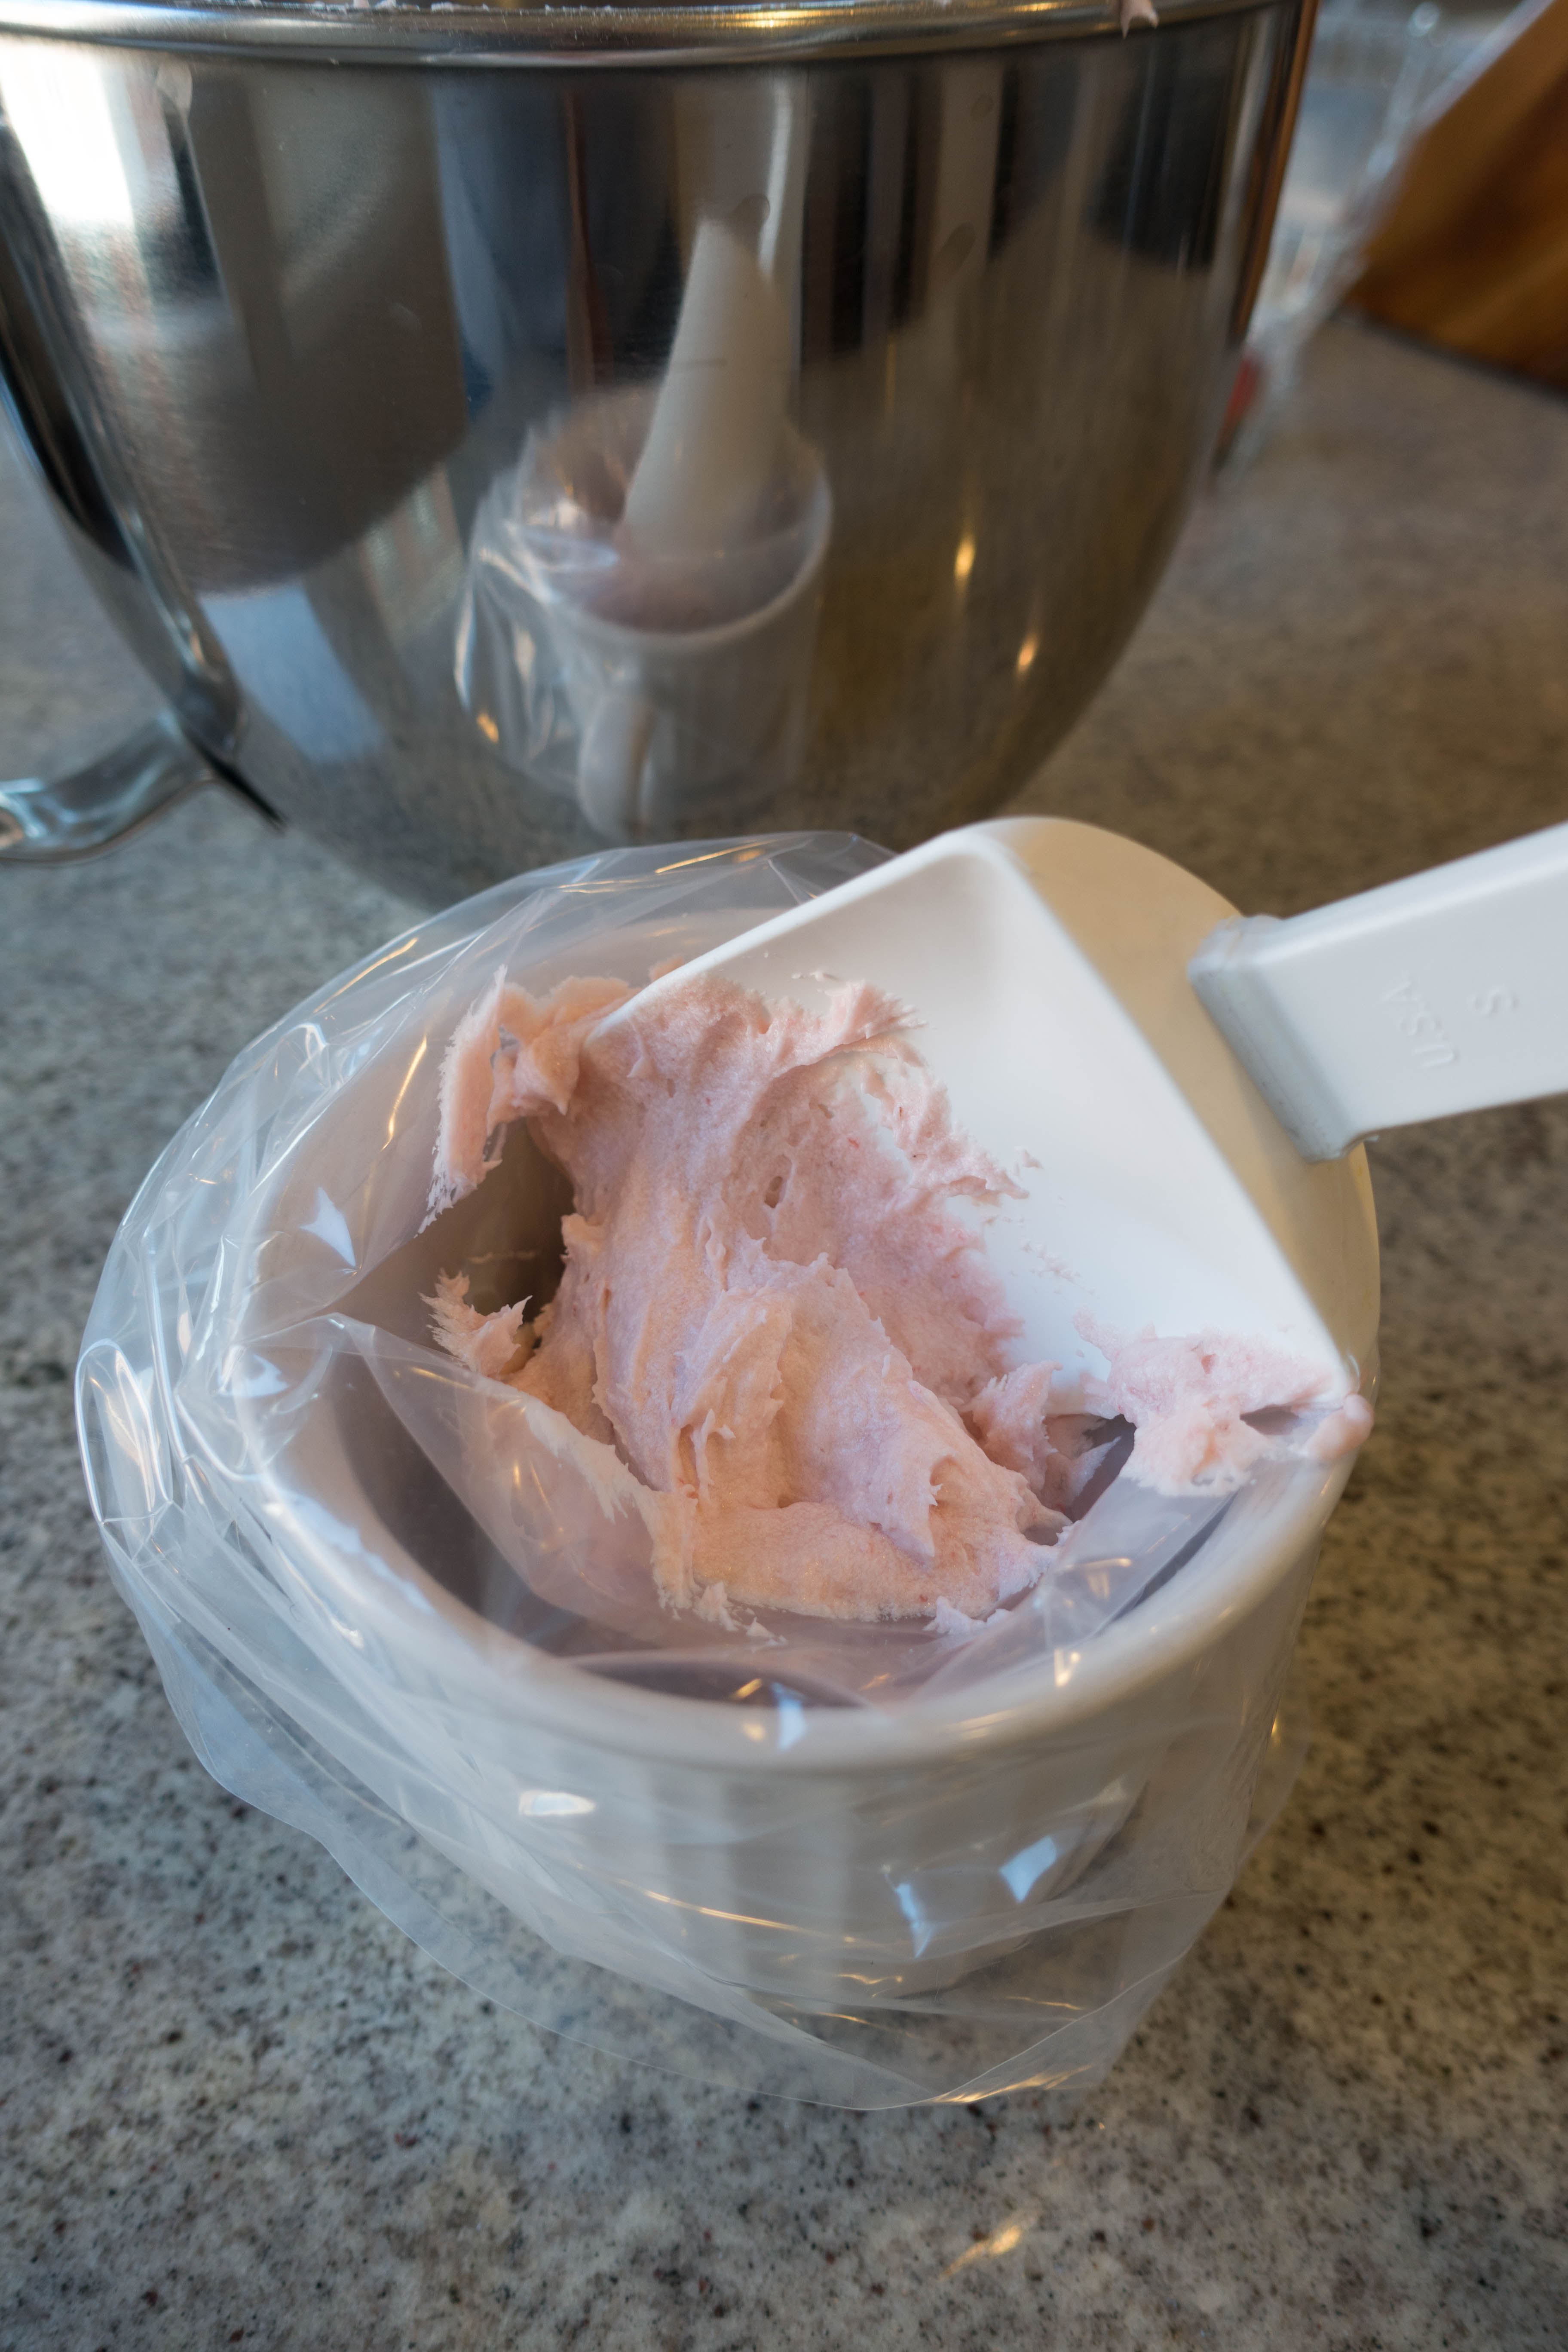
Prepare a piping bag with an open star tip, and fill it with your strawberry buttercream.
Take a cake layer and outline the top of it with frosting, working your way to the middle.
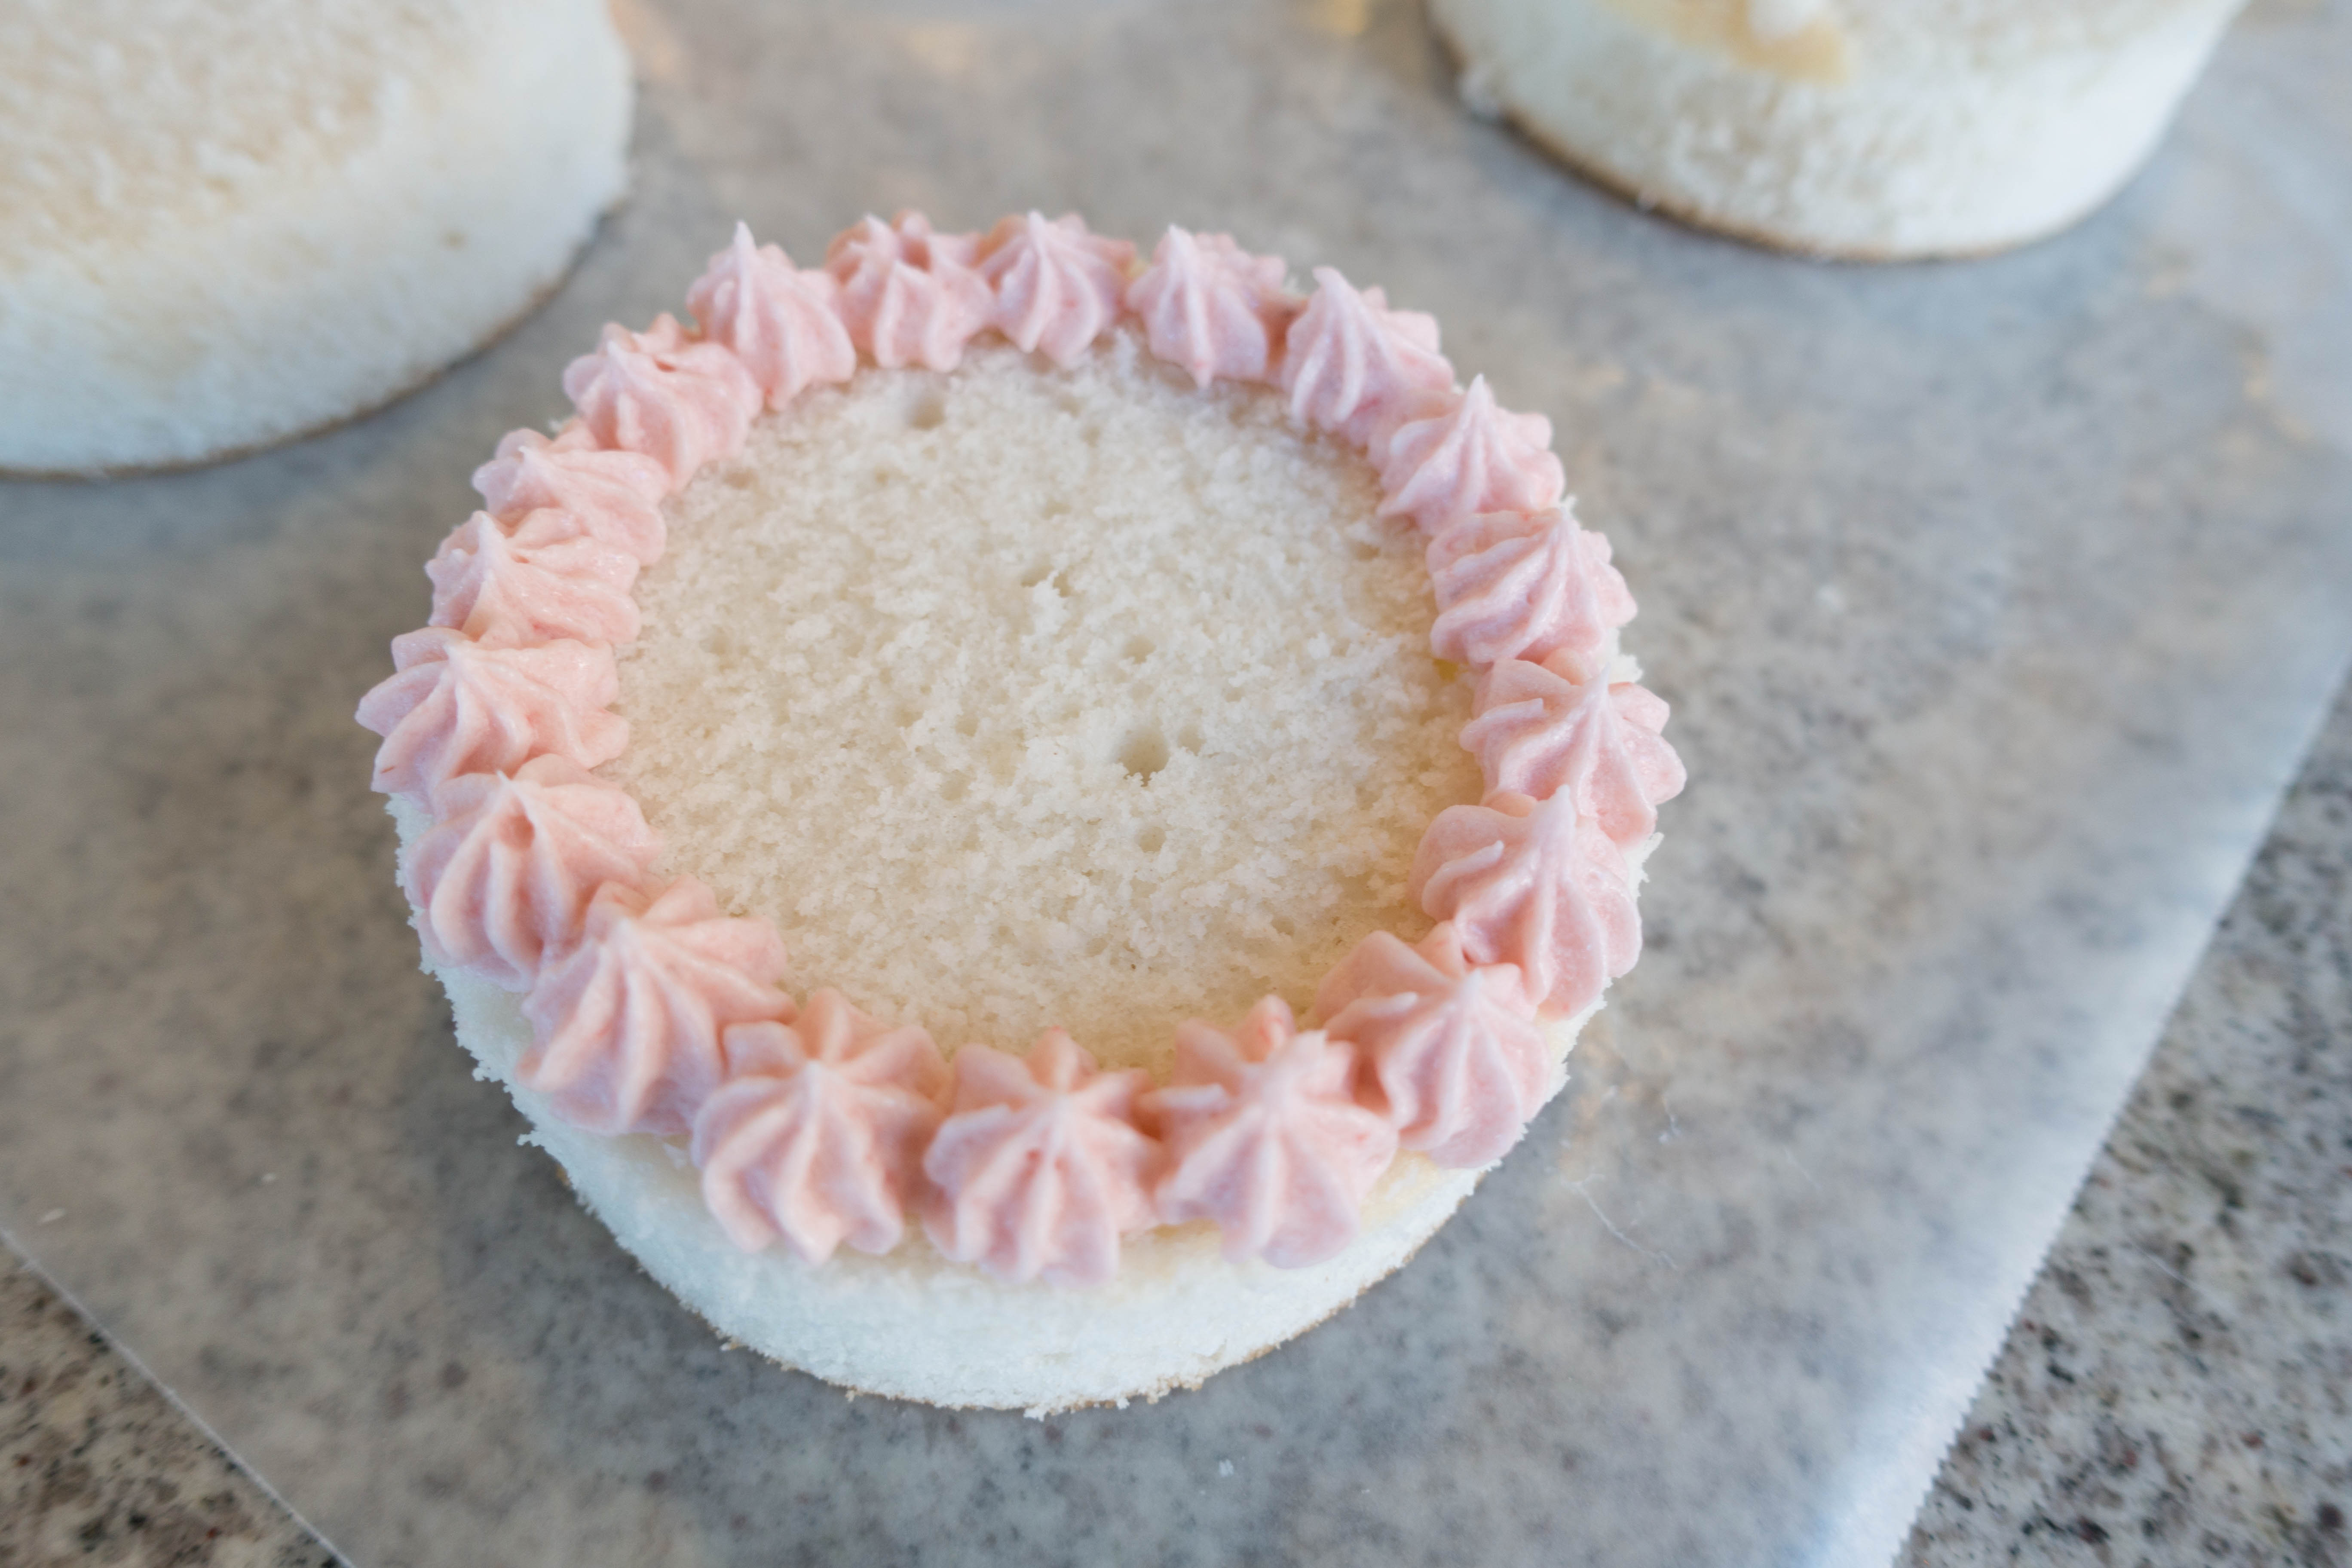
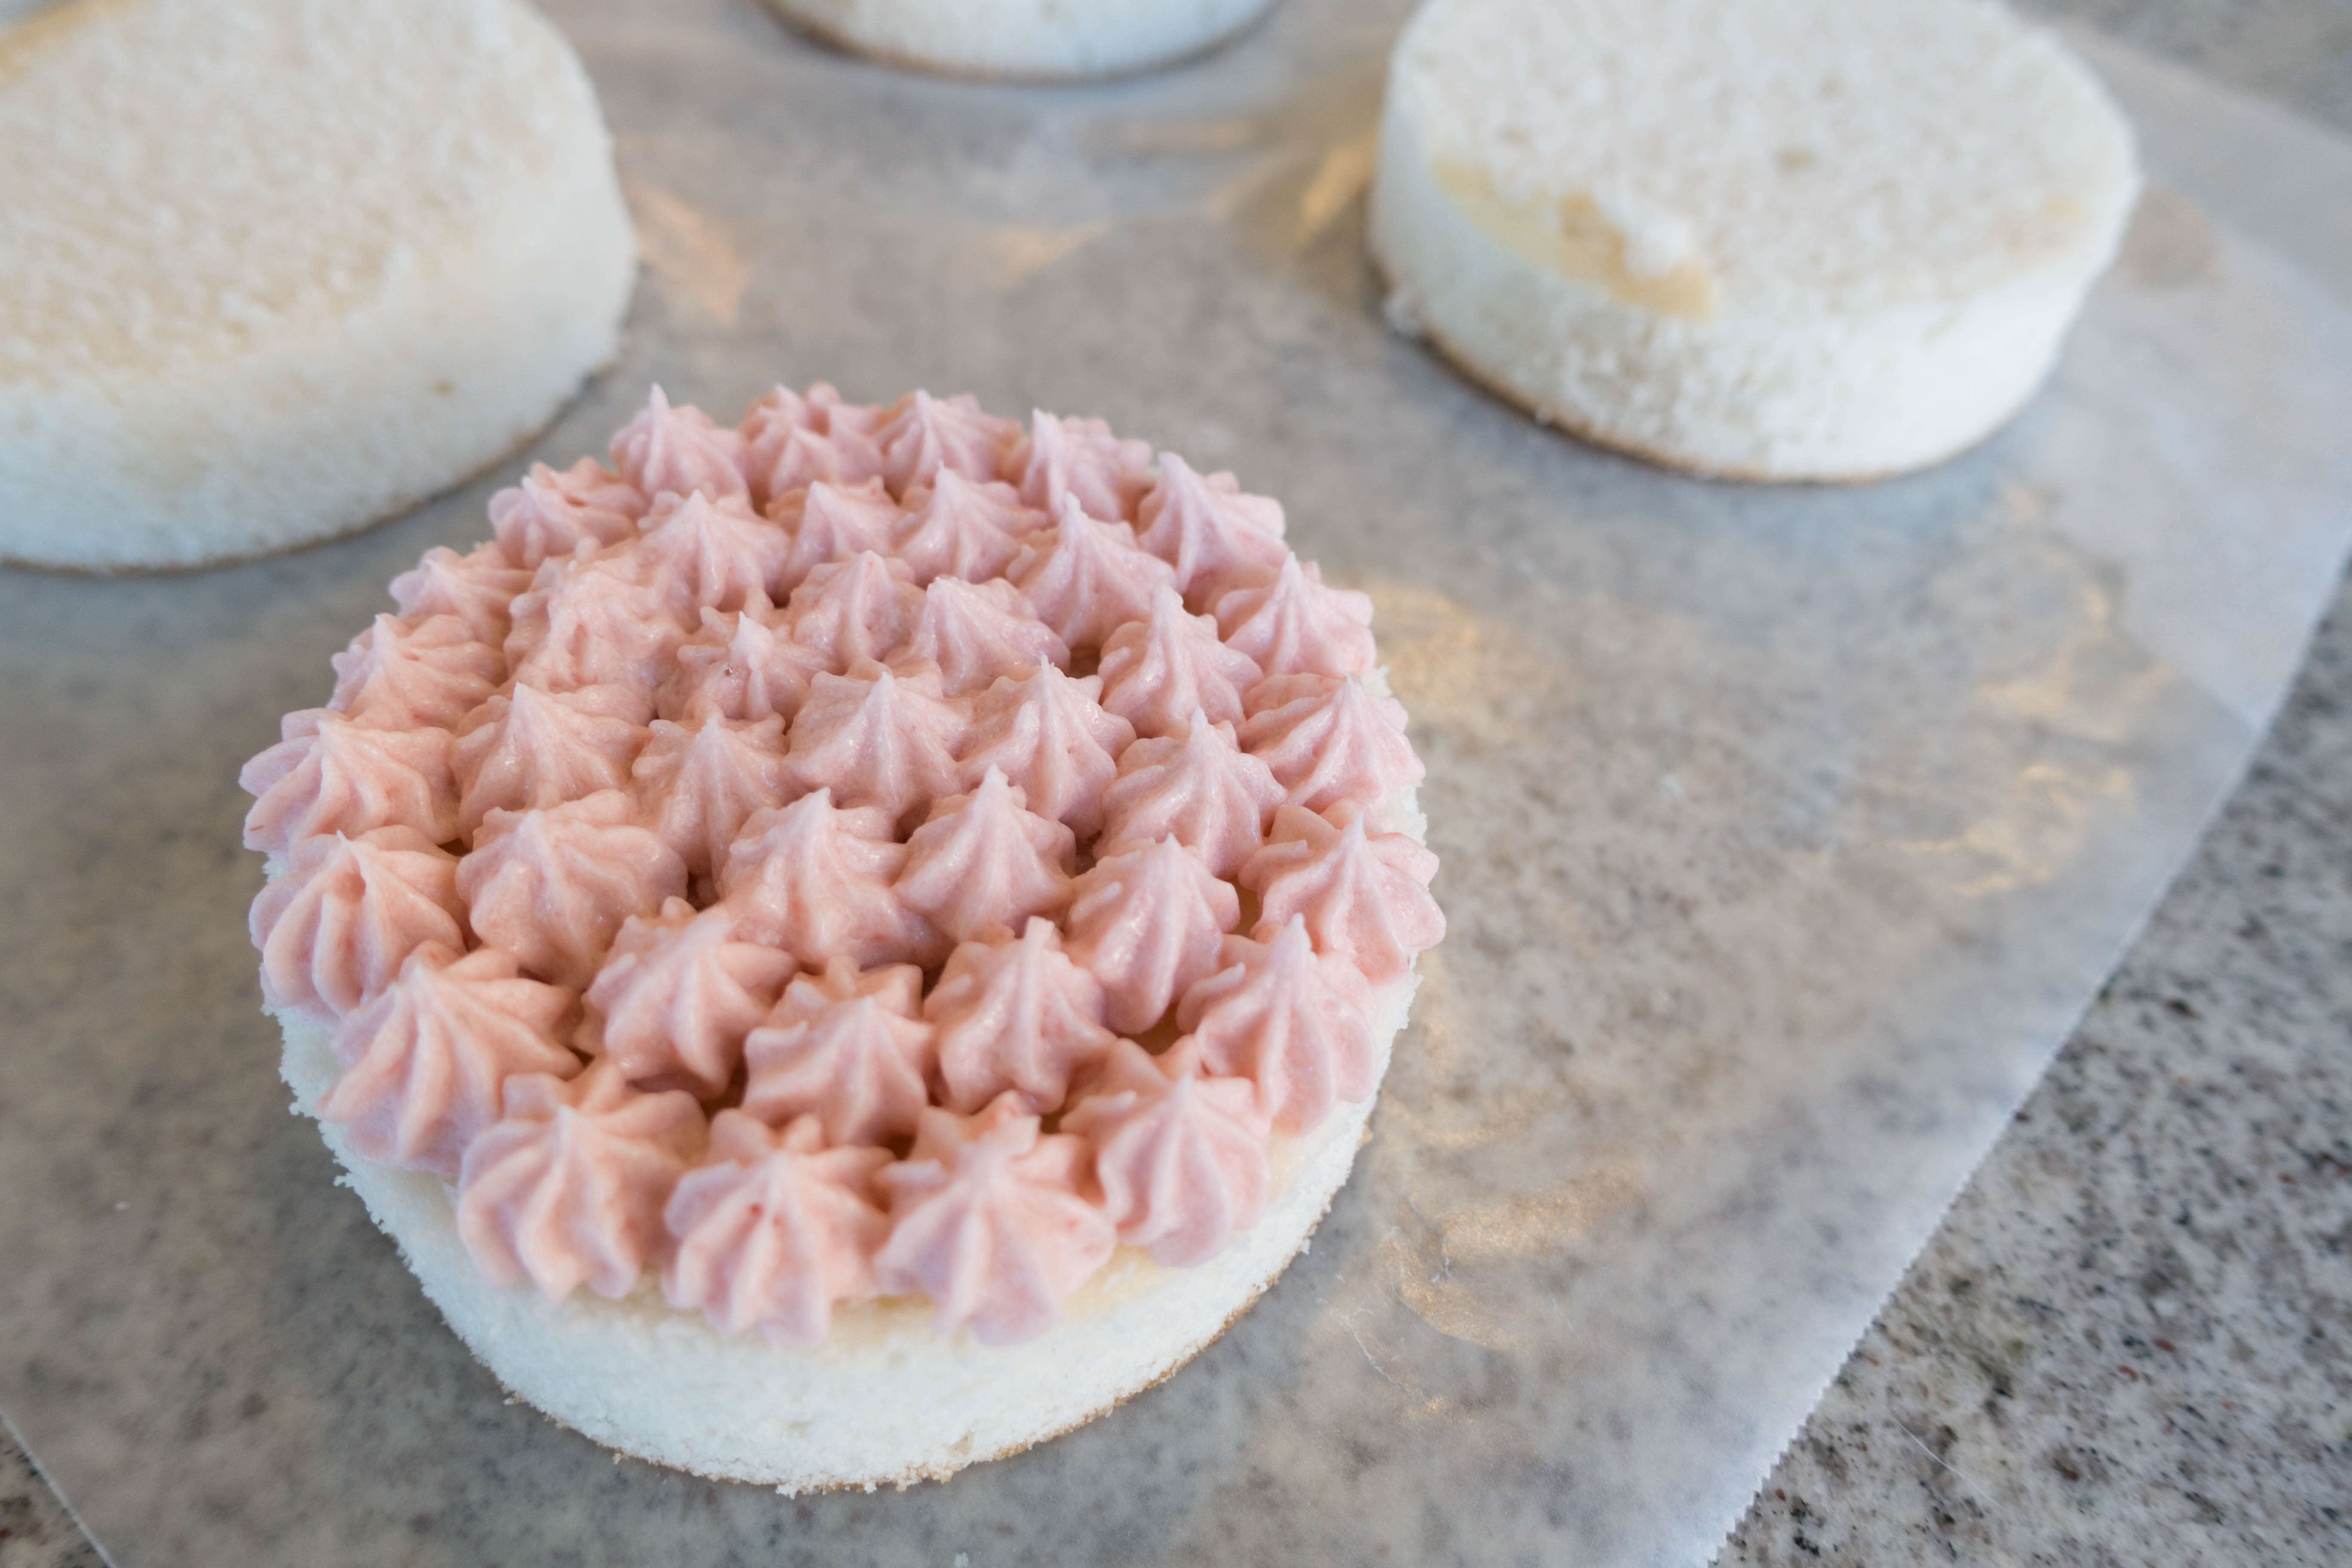
Gently set the top layer over the frosting. The goal is for the layers to stick together, but not be pressed too firmly (no squished frosting).
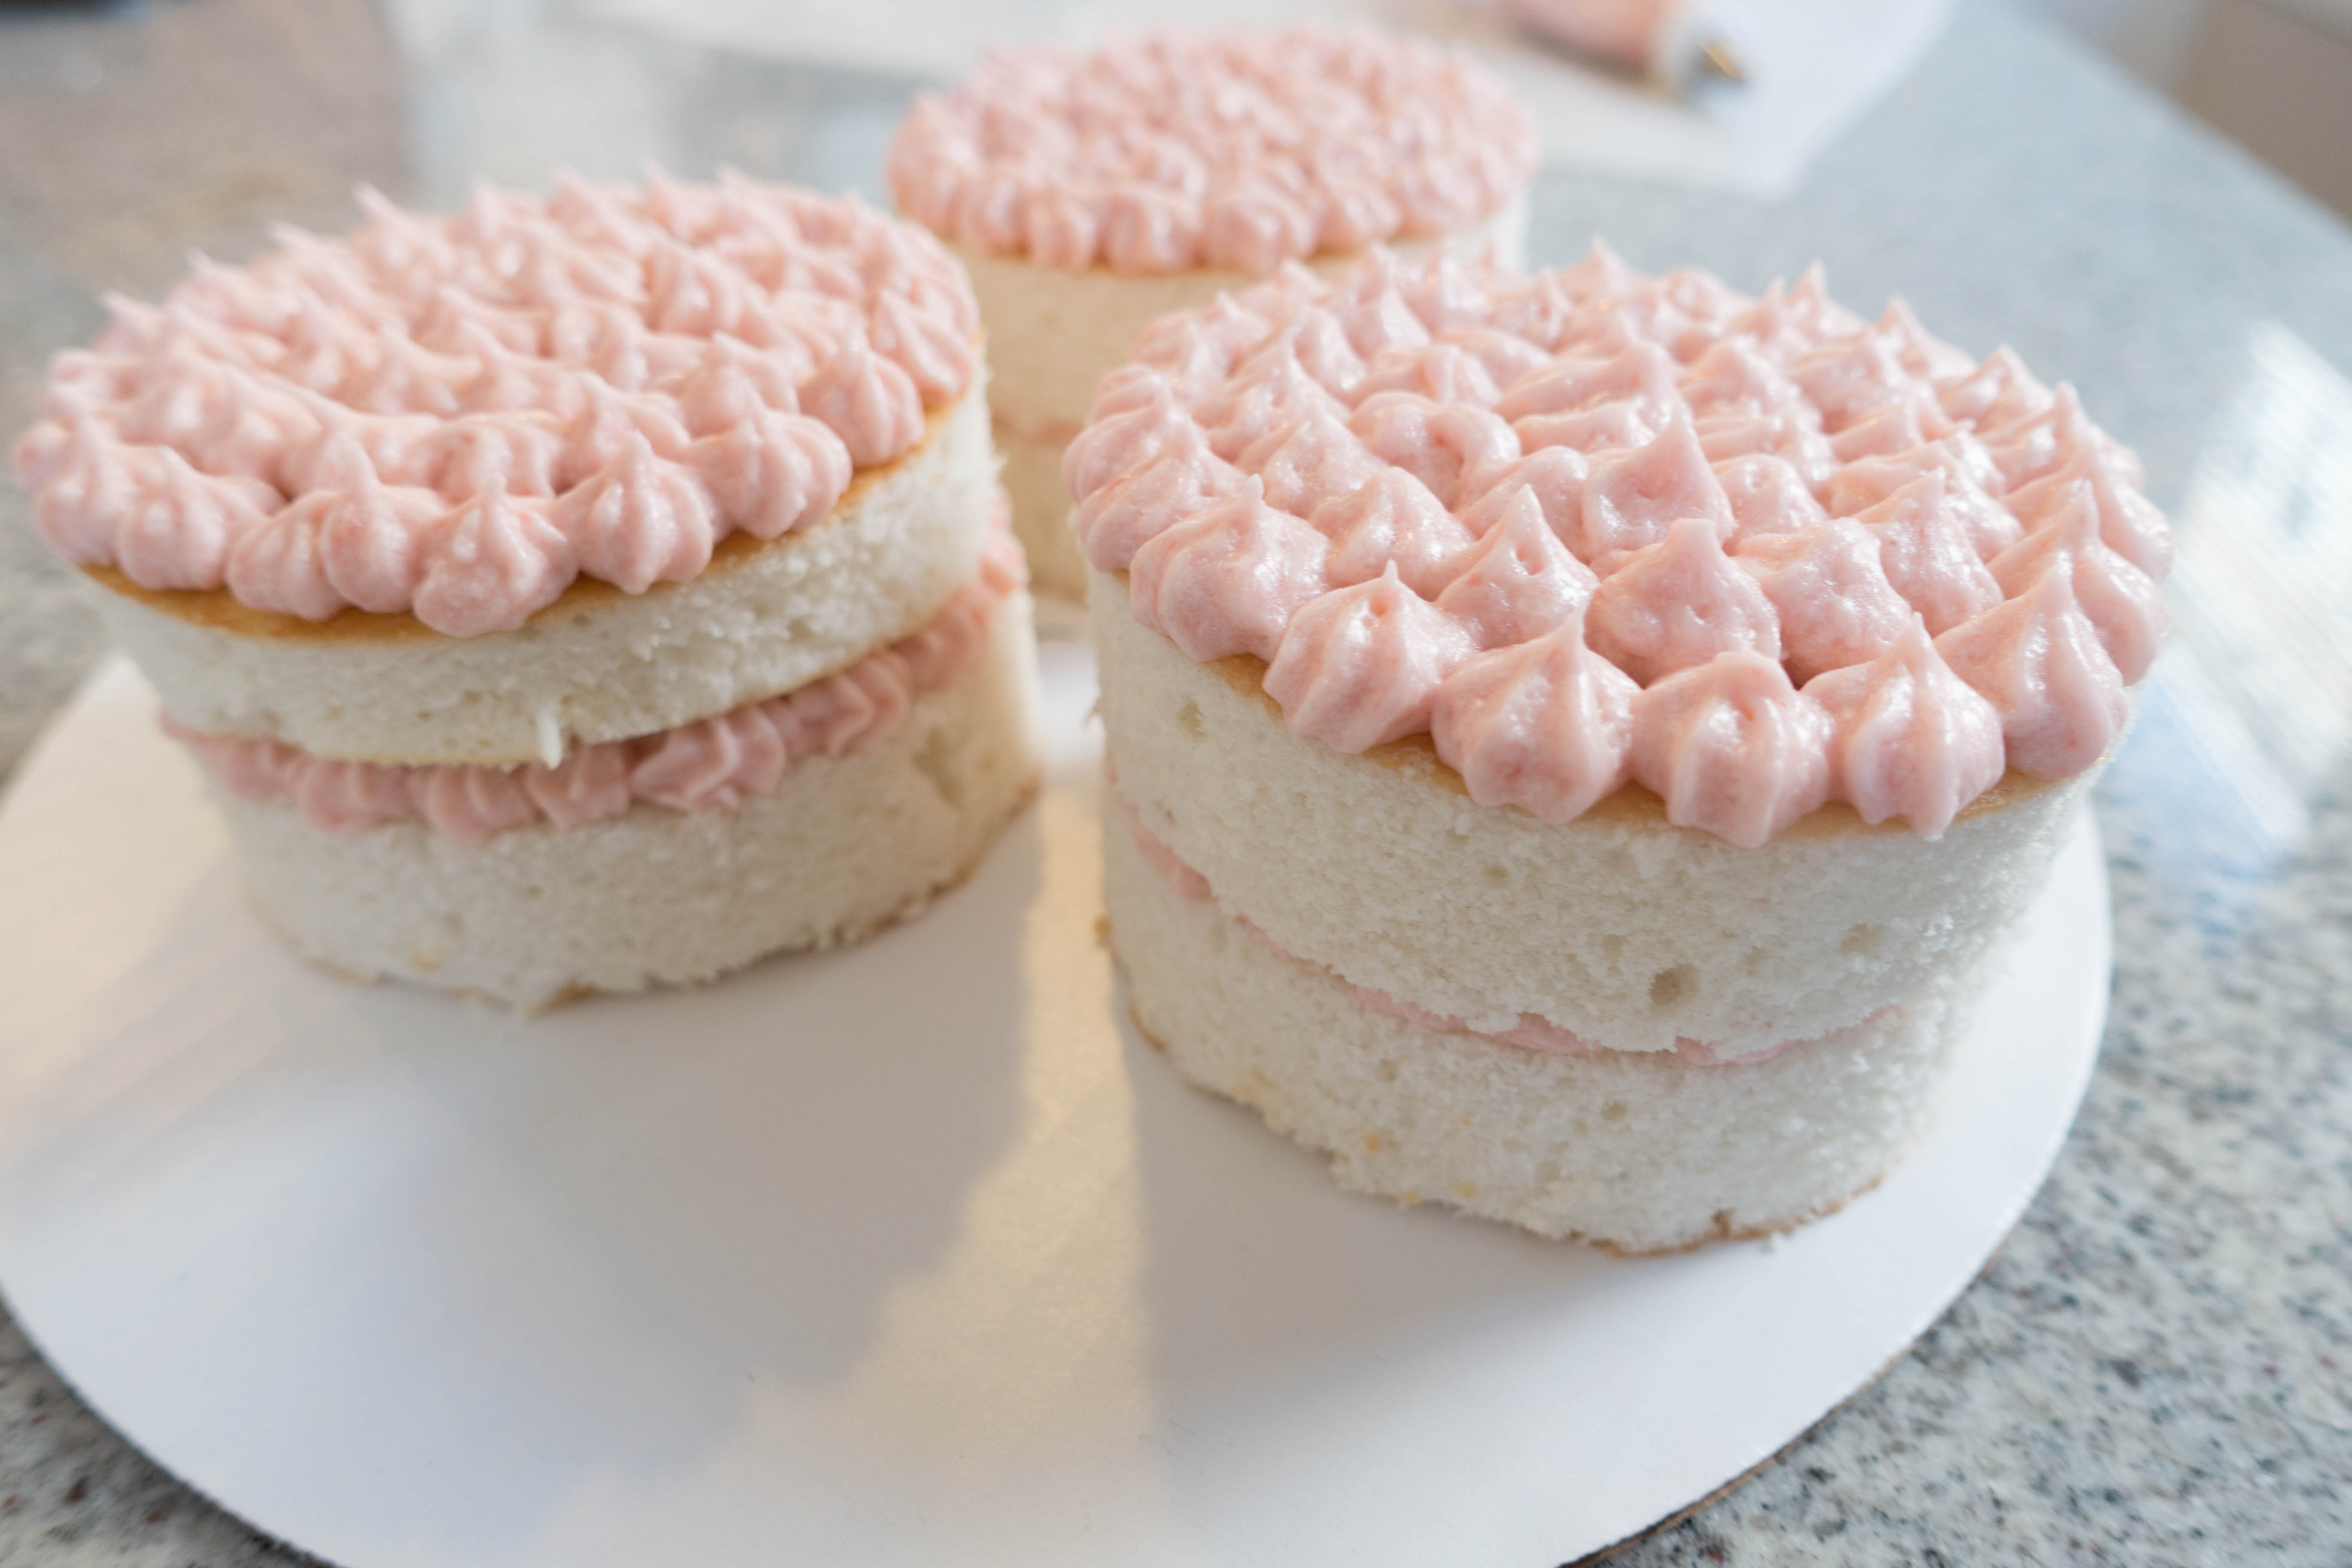
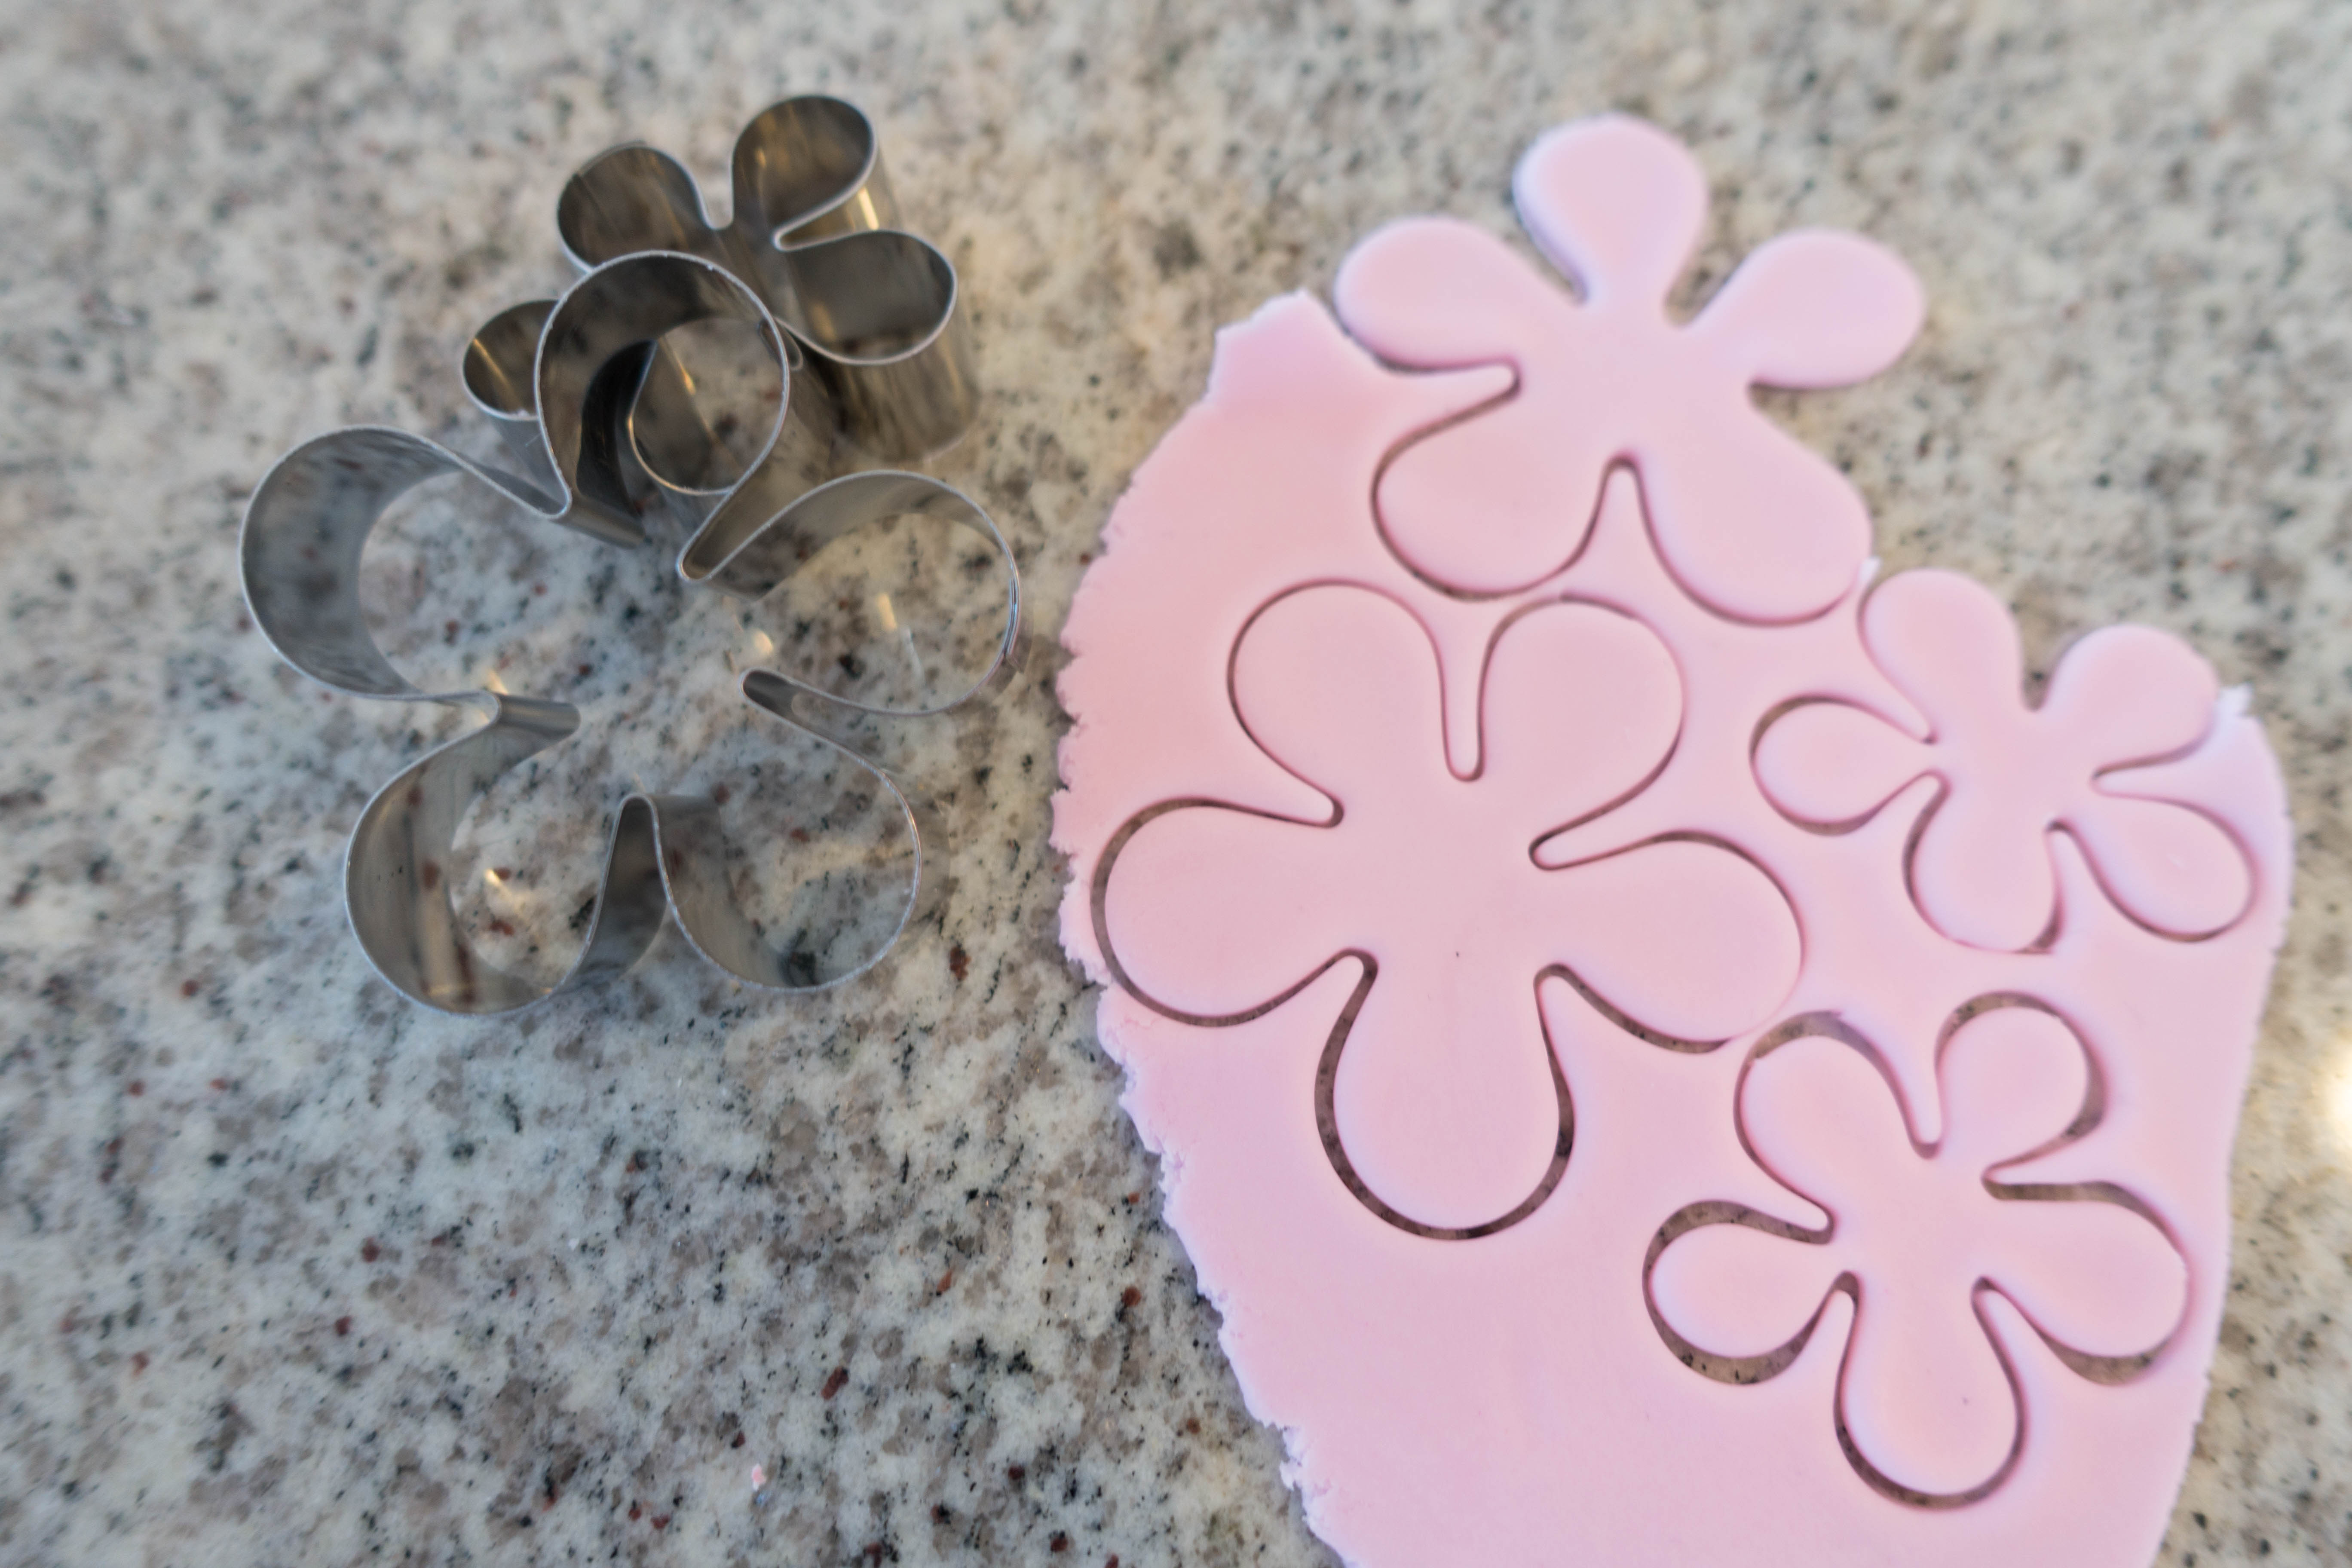
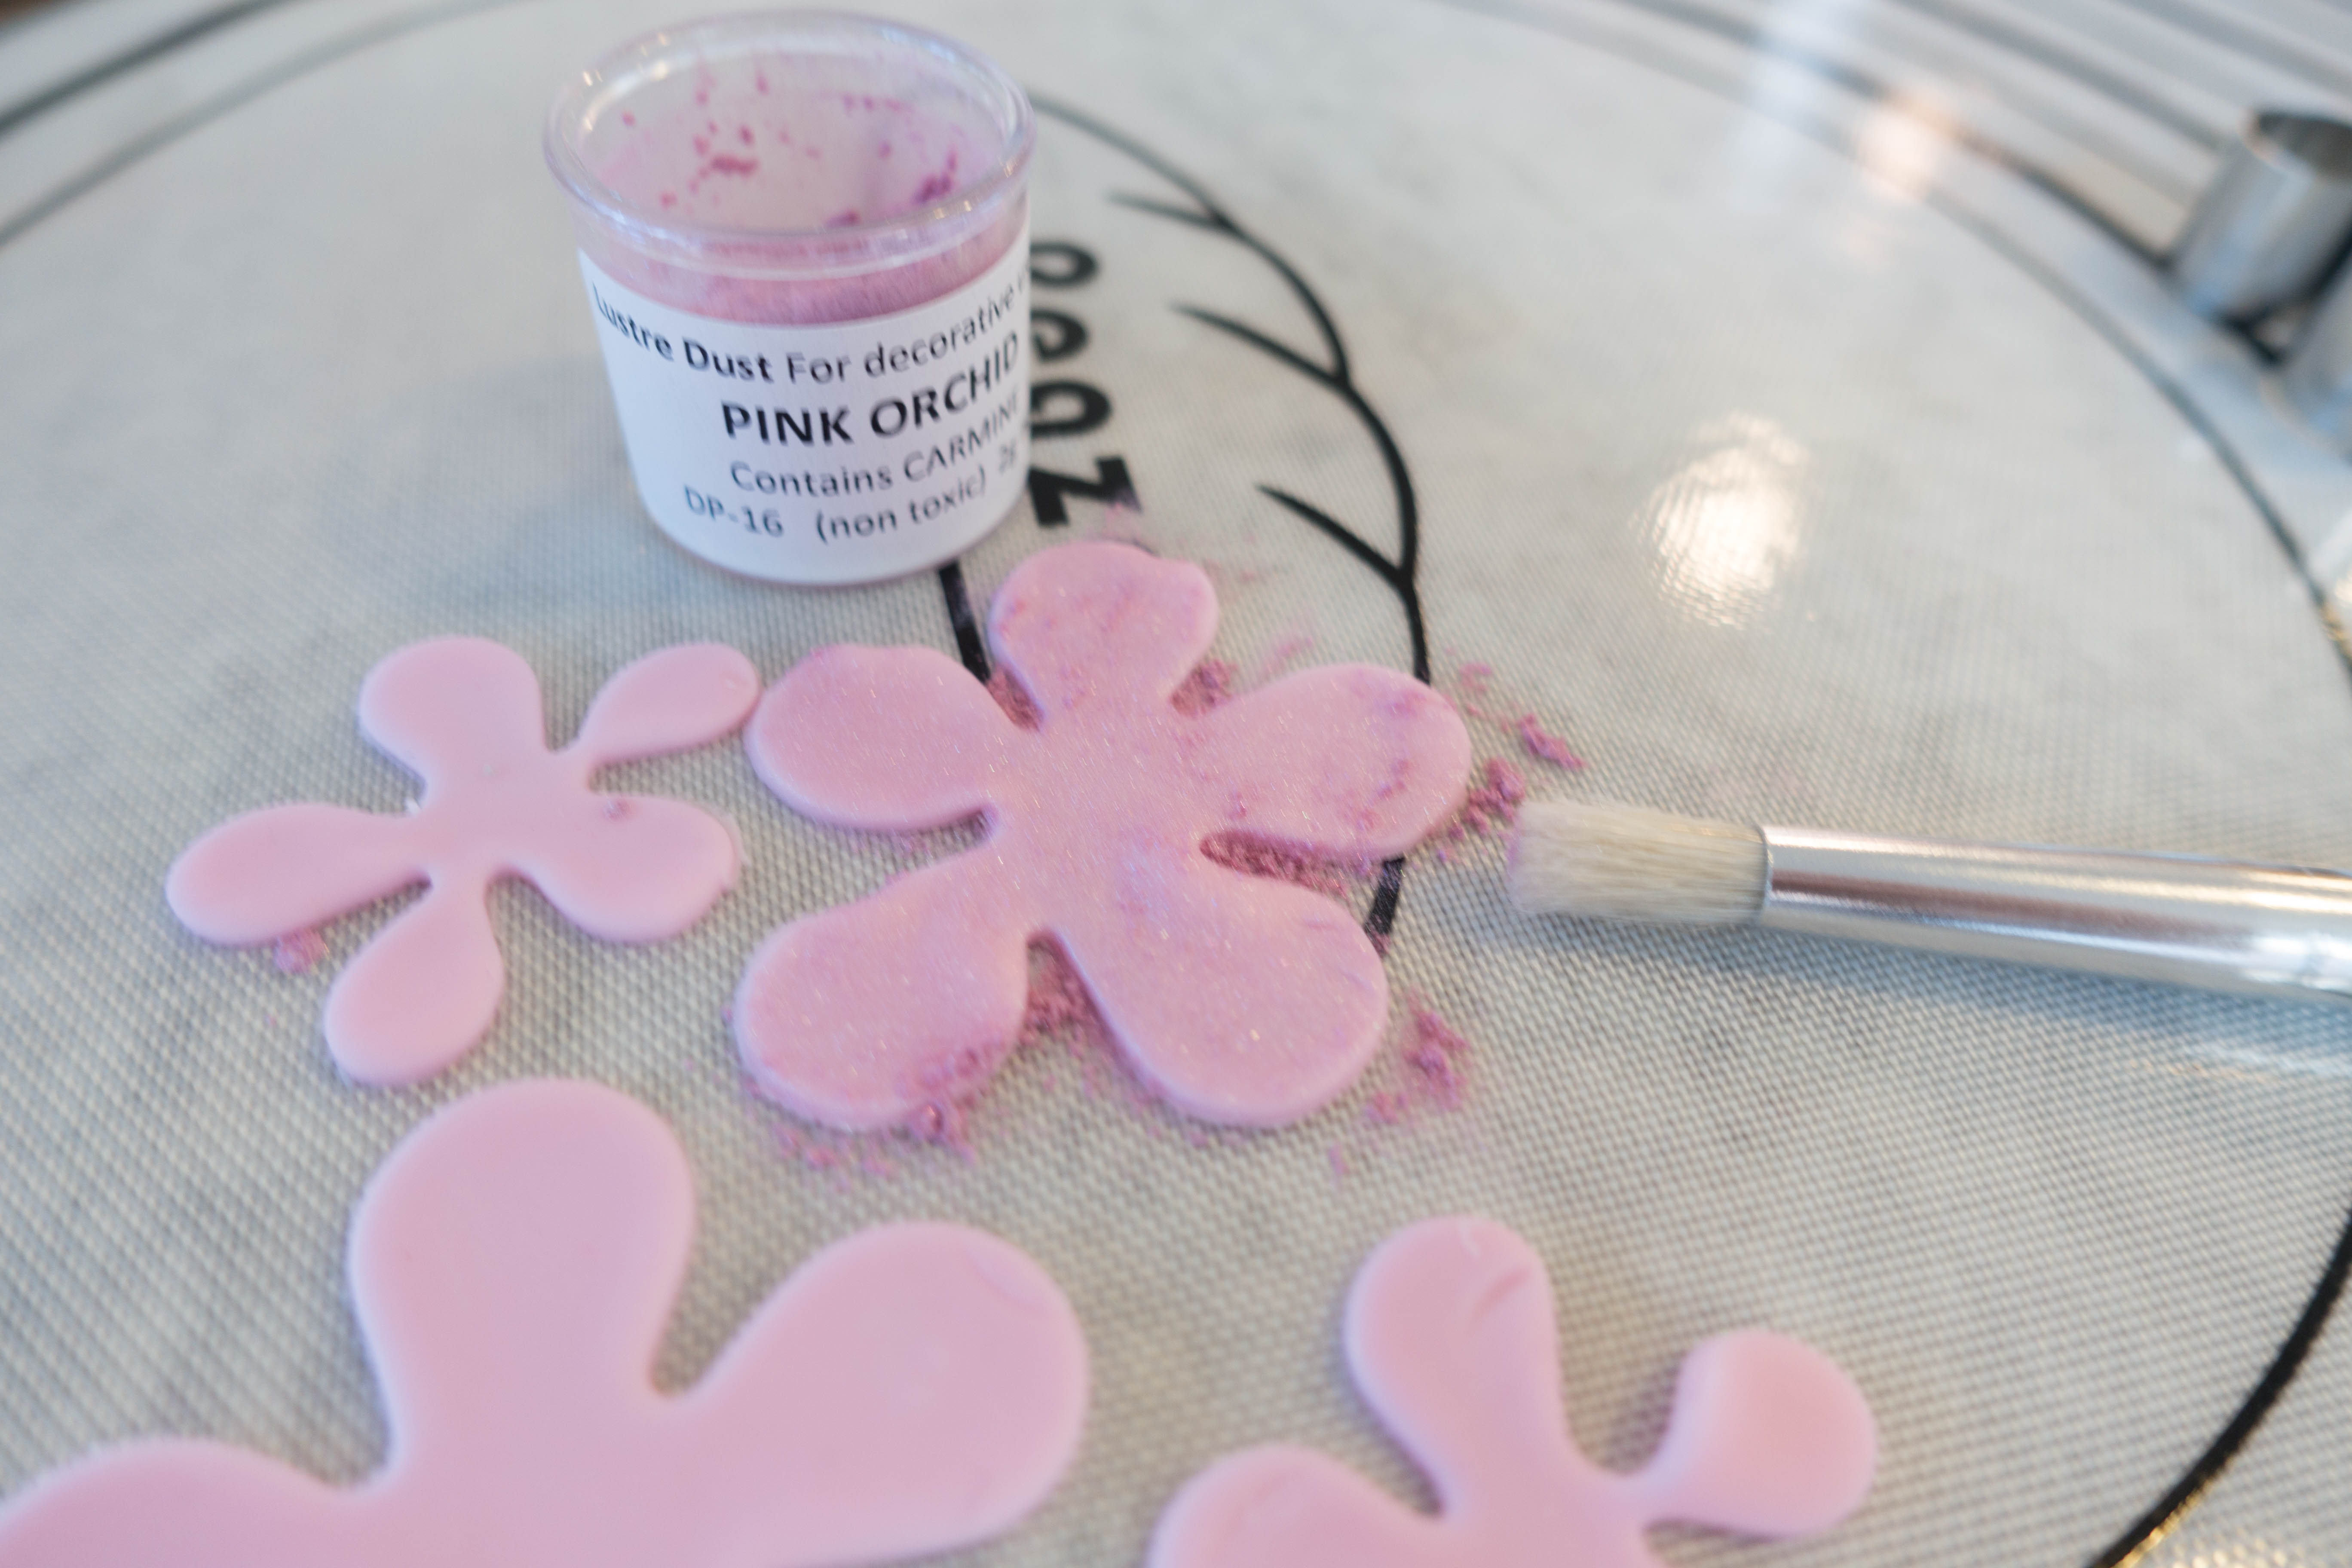
Now it’s time to decorate as you wish! I used some leftover pink fondant I had and cut out flower and letter shapes, dusting them with pink shimmer dust. Another option would be to cut tiny pieces of strawberry for decoration. You do you!
Happy Valentine’s Day!